
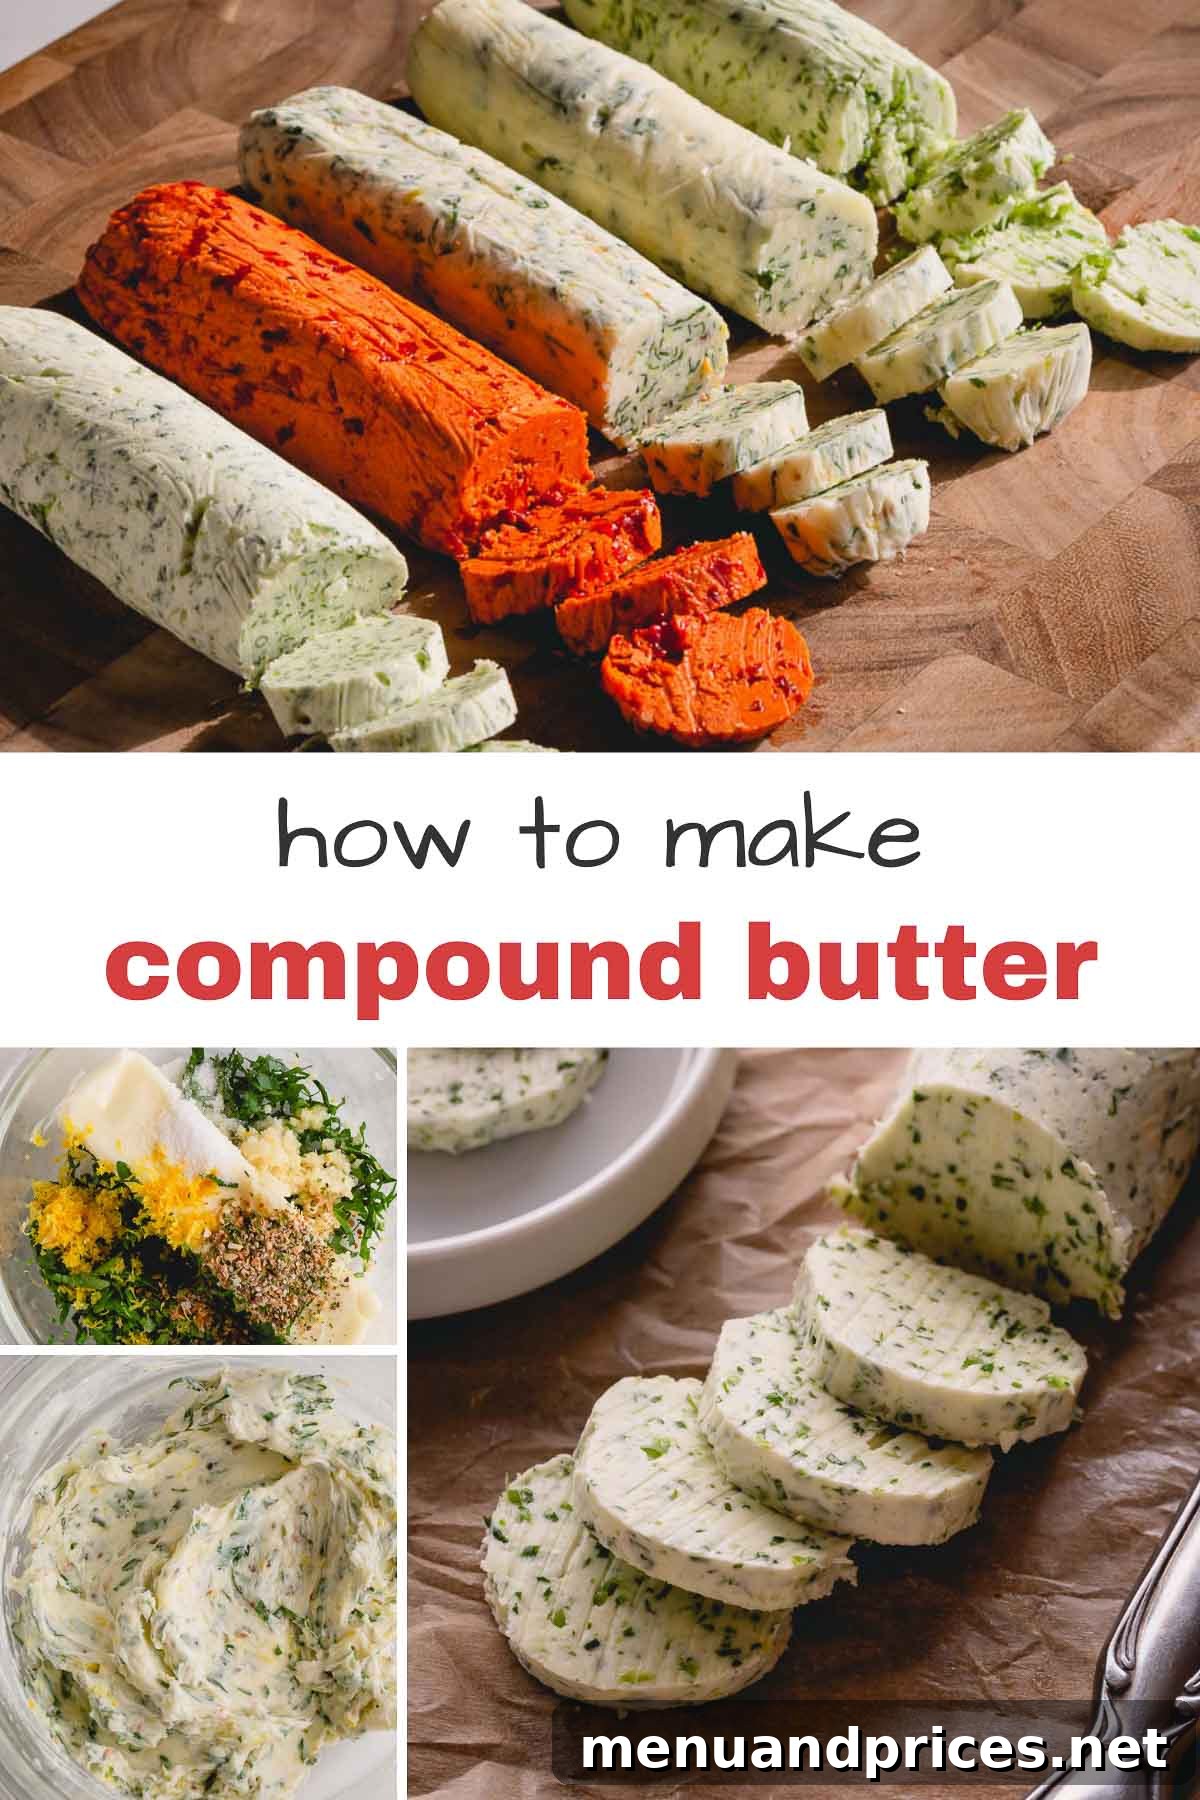
Mastering Compound Butter: Your Ultimate Guide to Flavorful Enhancements
Unlock a world of culinary possibilities with compound butter – a delightful fusion of softened butter infused with an array of fresh herbs, aromatic spices, zesty citrus, or even sweet fruits. This simple yet sophisticated spread has the power to transform everyday dishes into gourmet experiences. Whether you’re a seasoned chef or a home cooking enthusiast, learning how to make and utilize flavored butter is a game-changer. This guide will walk you through easy steps, creative shaping ideas, smart storage solutions, and countless ways to integrate this versatile ingredient into your cooking.
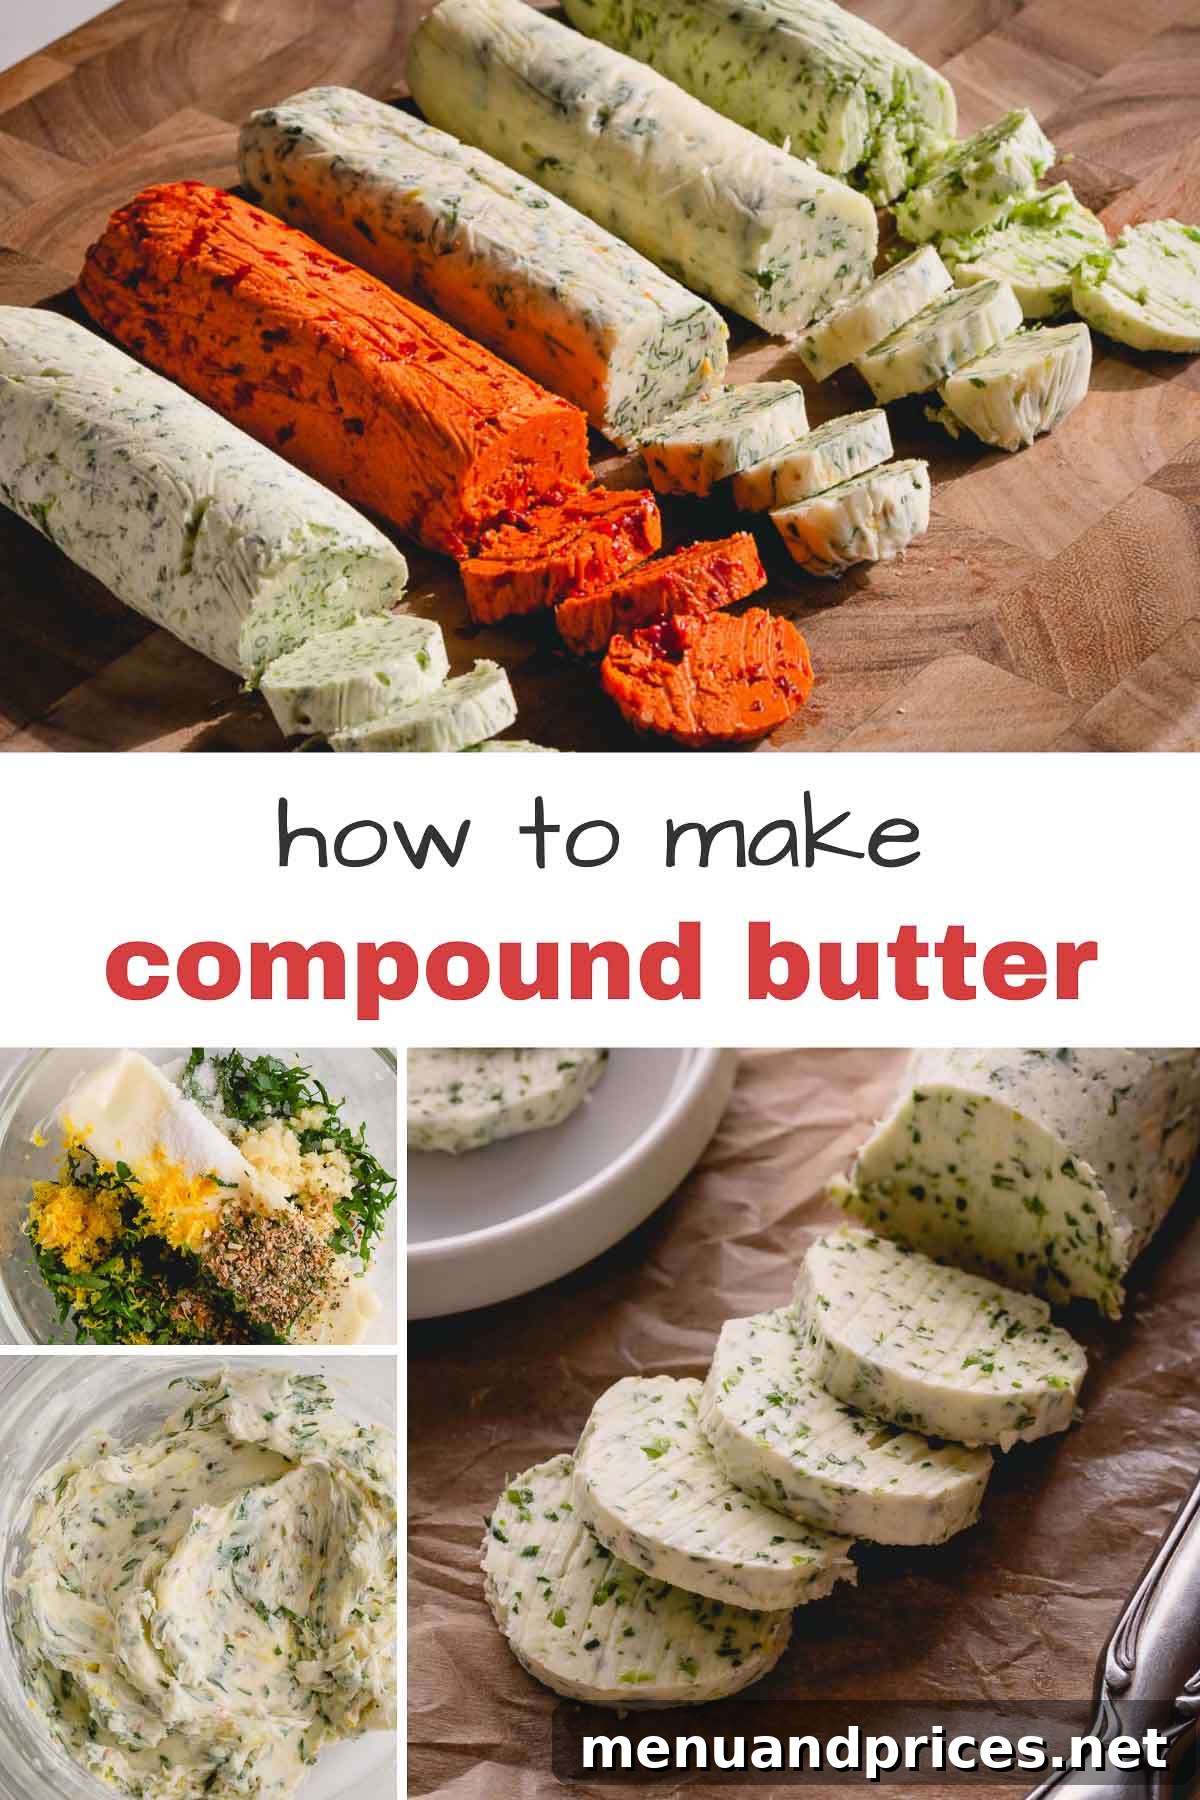
You might have encountered gourmet compound butter on the menu of your favorite steakhouse, expertly melting over a perfectly seared cut of meat, or perhaps found specialty varieties at artisanal food markets. What many don’t realize is how incredibly effortless it is to create these flavor-packed butters right in your own kitchen. It’s not only a breeze to prepare but also makes for a truly unique and thoughtful gift for any food lover. Get ready to impress your taste buds and your guests with this simple yet impactful culinary technique!
What is Compound Butter and Why is it So Special?
Essentially, compound butter is butter that has been “compounded” with additional ingredients to infuse it with enhanced flavor. The base is always softened butter, which is then vigorously mixed with a variety of complementary components. These mix-ins can be incredibly diverse, ranging from classic fresh herbs like parsley, chives, and dill, to pungent aromatics such as garlic and shallots. The possibilities extend to vibrant citrus zests, warming spices, sweet additions like honey or dried fruit, savory elements like cheese or roasted vegetables, and even a splash of wine or spirits.
The beauty of flavored butter lies in its ability to deliver a concentrated burst of taste directly where it’s needed. Instead of seasoning a dish with separate ingredients, a single dollop or slice of compound butter introduces a harmonious blend of flavors that melts seamlessly, enriching and enhancing the overall profile of your meal. It’s a quick and easy way to add a sophisticated touch and depth of flavor without complex cooking processes, making it a staple for both everyday meals and special occasions.
The Advantages of Crafting Your Own Flavored Butter
While store-bought options exist, making homemade compound butter offers numerous benefits:
- Superior Freshness: You control the quality and freshness of every ingredient, leading to more vibrant and potent flavors.
- Customized Flavor Profiles: Tailor the taste precisely to your preferences or to complement a specific dish, allowing for endless creativity.
- Control Over Ingredients: Choose organic butter, adjust salt content, and avoid artificial additives or preservatives often found in commercial products.
- Cost-Effective: Preparing your own compound butter is generally more economical than purchasing premium specialty butters from gourmet shops.
- Impressive Presentation: A beautifully shaped and flavored butter elevates any plate and makes a wonderful, personalized gift.
- Reduced Waste: Utilize leftover herbs or spices from other recipes, giving them a delicious second life.
Effortless Creation: How to Make Compound Butter at Home
Crafting your own flavor-infused butter is remarkably straightforward, typically involving just a few simple steps. You have the flexibility to choose between two main methods, depending on your desired texture and the tools available in your kitchen:
Method 1: Manual Mixing in a Bowl
This classic technique is ideal for smaller batches and when you prefer a slightly discernible texture from your chosen mix-ins. It also offers a tactile connection to the ingredients.
- Soften the Butter to Perfection: Begin with high-quality unsalted butter. It needs to be at room temperature, soft enough to easily indent with your finger but not melted or oily. This usually takes 30-60 minutes on the counter. If you’re in a hurry, microwave cold butter in very short 5-second intervals, checking and flipping after each, until it reaches the ideal pliable consistency.
- Mince Your Ingredients Finely: Thorough preparation of your mix-ins is crucial for even flavor distribution. Finely chop or mince any fresh ingredients, such as herbs (parsley, cilantro, rosemary), garlic, shallots, or dried fruits. The finer the chop, the more smoothly they will blend into the butter and release their flavors.
- Combine and Blend: In a medium-sized mixing bowl, place your softened butter. Add all your prepared mix-ins, along with any dry spices, citrus zests, or other flavorings. Use a sturdy spoon or a flexible spatula to vigorously stir and fold the ingredients together. Continue mixing until everything is thoroughly incorporated and evenly distributed throughout the butter, with no streaks of plain butter remaining.
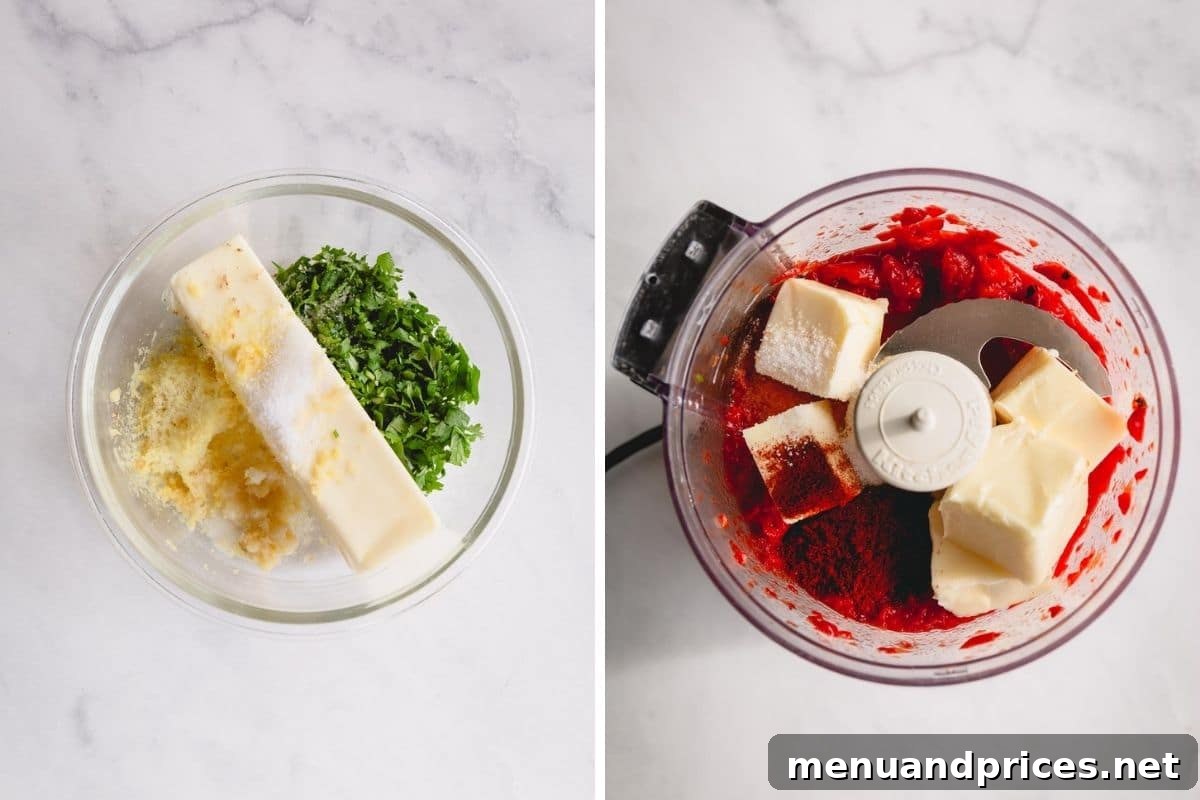
Method 2: Using a Food Processor for Speed and Smoothness
For larger quantities, extremely fine incorporation of ingredients, or when dealing with harder additions like nuts or fibrous herbs, a food processor is an invaluable tool that makes the process even faster.
- Process Solid Mix-Ins First: Add your harder or larger solid ingredients (fresh herbs, garlic cloves, ginger, dried fruits, roasted peppers) to the bowl of a small food processor. Pulse several times until they are very finely minced or almost pureed. This ensures optimal breakdown before the butter is introduced.
- Incorporate Softened Butter and Remaining Flavors: Once your mix-ins are finely processed, add the softened butter and any remaining ingredients, such as honey, salt, or liquid flavorings, to the food processor bowl.
- Pulse Until Just Combined: Pulse the mixture a few more times until everything is fully combined and the butter has a uniform color and texture. Be careful not to over-process, as the heat generated by the motor can warm the butter too much, leading to an undesirable oily consistency. Stop immediately once smooth and cohesive.
Shaping and Storing Your Gourmet Butter Creations
After your homemade flavored butter is mixed, shaping it not only adds to its visual appeal but also facilitates convenient storage and serving. Here are the most popular methods for preparing your compound butter for refrigeration or freezing:
Shaping into a Log (The Classic Presentation)
This is arguably the most common and practical way to store compound butter, as it allows for easy slicing into uniform portions.
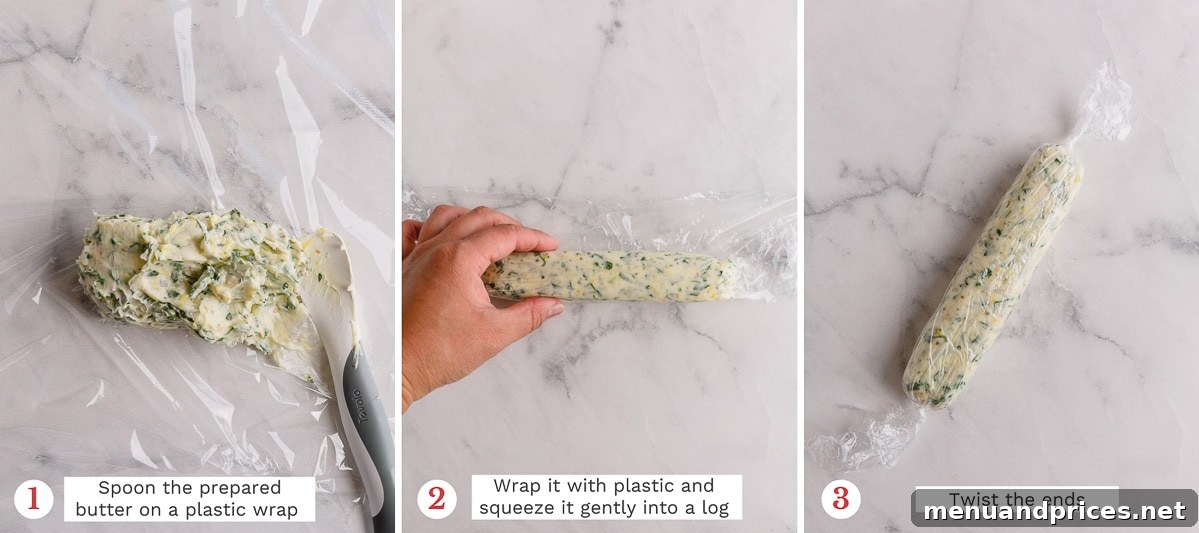
- Prepare Your Wrapping Material: Lay out a generous square of parchment paper or wax paper on a clean work surface. These materials are preferable to plastic wrap, as they tend to stick less to the butter.
- Form the Initial Shape: Use a spatula to scrape the entire butter mixture onto the center of the paper. Gently form it into a rough log shape, approximately 1.5 to 2 inches in diameter.
- Roll and Tighten: Using the paper as a guide, begin rolling the butter into a tight, cylindrical log. As you roll, occasionally pull the paper back slightly to ensure the butter is compact and any air pockets are expelled. Twist both ends of the parchment paper like a candy wrapper to seal and further firm the log.
- Chill Until Solid: Place the wrapped butter log in the refrigerator for at least 2 hours, or until it becomes firm enough to slice cleanly without crumbling.
Serving as Whipped Compound Butter (For Immediate Spreading)
If you desire a lighter, airier texture that’s perfect for immediate spreading on warm breads or pastries, whipping the butter is the way to go.
- Whip the Butter First: Before adding any flavorings, place the softened butter into a mixing bowl. Using an electric hand mixer or a stand mixer with the whisk attachment, whip the butter on medium-high speed until it becomes light, fluffy, and visibly paler in color – typically 2-3 minutes.
- Gently Fold in Mix-Ins: Reduce the mixer speed to low, or carefully fold in your finely chopped or pureed mix-ins by hand. Mix until just combined. Overmixing at this stage can cause the whipped butter to lose its airy texture.
- Serve or Chill: Scoop the beautifully whipped compound butter into a decorative serving bowl. Serve immediately with a spreading knife. If not serving right away, cover the bowl tightly with plastic wrap and refrigerate. Remember to let it sit at room temperature for about 30 minutes before serving to restore its ideal spreadable consistency.
Creating Decorative Molds (For Elegant Individual Portions)
For an extra touch of elegance or perfectly portioned individual servings, silicone molds are an excellent choice.
- Fill the Molds: Carefully spoon the freshly prepared compound butter mixture into your chosen silicone molds. Small decorative shapes, round disk molds, or even standard ice cube trays work wonderfully.
- Smooth and Level: Use an offset spatula or the flat side of a knife to scrape off any excess butter from the top of the molds, ensuring each portion has a clean, smooth, and even surface.
- Chill and Unmold: Refrigerate the filled molds for at least 2 hours, or until the butter is completely firm. Once solid, gently press on the bottom of the silicone molds to pop out the hardened, shaped butter pieces. Store these in an airtight container in the refrigerator or freezer.
Dry vs. Fresh Herbs: The Best Choice for Your Flavored Butter
The type of herbs you choose plays a significant role in the overall flavor and aroma of your herb butter. Both dried and fresh herbs have their place, but understanding their differences will help you achieve the best results:
- Fresh Herbs: Without a doubt, fresh herbs deliver a brighter, more vibrant, and complex flavor profile. They also contribute a beautiful visual appeal with their natural green flecks. Fresh herbs are generally preferred when the herb is a prominent flavor component, offering a more aromatic and lively essence. Always ensure they are very finely minced to allow their essential oils to infuse thoroughly and to prevent large, chewy pieces in the butter.
- Dried Herbs: Dried herbs offer convenience and a more concentrated, often earthier flavor. Their potency is typically stronger due to the dehydration process. When substituting dried for fresh herbs, a good rule of thumb is to use one-third the amount of dried herbs. For example, if a recipe calls for 1 tablespoon of fresh herbs, use only 1 teaspoon of dried herbs. Always crush dried herbs lightly between your fingers or in a mortar and pestle before adding them to the butter; this helps to release their aromatic oils and maximize flavor.
For optimal taste and a truly gourmet experience, fresh herbs are usually the superior choice. However, dried herbs are a perfectly acceptable and convenient alternative, especially when fresh options are unavailable or for butters where the herb flavor is one of many strong components.
Essential Tips for Perfect Compound Butter Every Time
Crafting flawless homemade flavored butter is simple when you keep these crucial tips in mind:
- Prioritize Unsalted Butter: Always opt for unsalted butter. This allows you complete control over the salt content, which is vital as different mix-ins (like cheese or olives) can add their own salinity.
- Achieve the Right Butter Consistency: The butter must be perfectly softened – not cold and hard, and definitely not melted and oily. It should be pliable like soft cream cheese. This ensures even incorporation of ingredients and a smooth, cohesive final product.
- Finely Mince All Solid Additions: Whether it’s herbs, garlic, or dried fruit, finely mincing your solid ingredients is non-negotiable. Large chunks can lead to an uneven distribution of flavor and an undesirable texture.
- Avoid Overmixing: Mix the butter and mix-ins only until just combined. Overmixing, especially in a food processor, can introduce too much air, creating a less dense product, or warm the butter excessively, leading to separation.
- Chill for at Least Two Hours: If you plan to slice your compound butter into rounds, it must be thoroughly chilled until firm. A minimum of two hours in the refrigerator is recommended for clean, crisp slices.
- Use Parchment or Wax Paper for Rolling: While plastic wrap can work, parchment or wax paper is far superior for rolling butter logs. It prevents sticking and allows for a much cleaner, tighter shape.
- Always Taste and Adjust Seasoning: Before wrapping and chilling, always taste a small amount of your butter (if ingredients are safe to consume raw). This is your chance to adjust the salt, add more herbs, or tweak any other seasonings to perfection.
- Consider Butter Quality: The better the quality of your base butter, the better your final compound butter will taste. Opt for high-fat, delicious butter if possible.
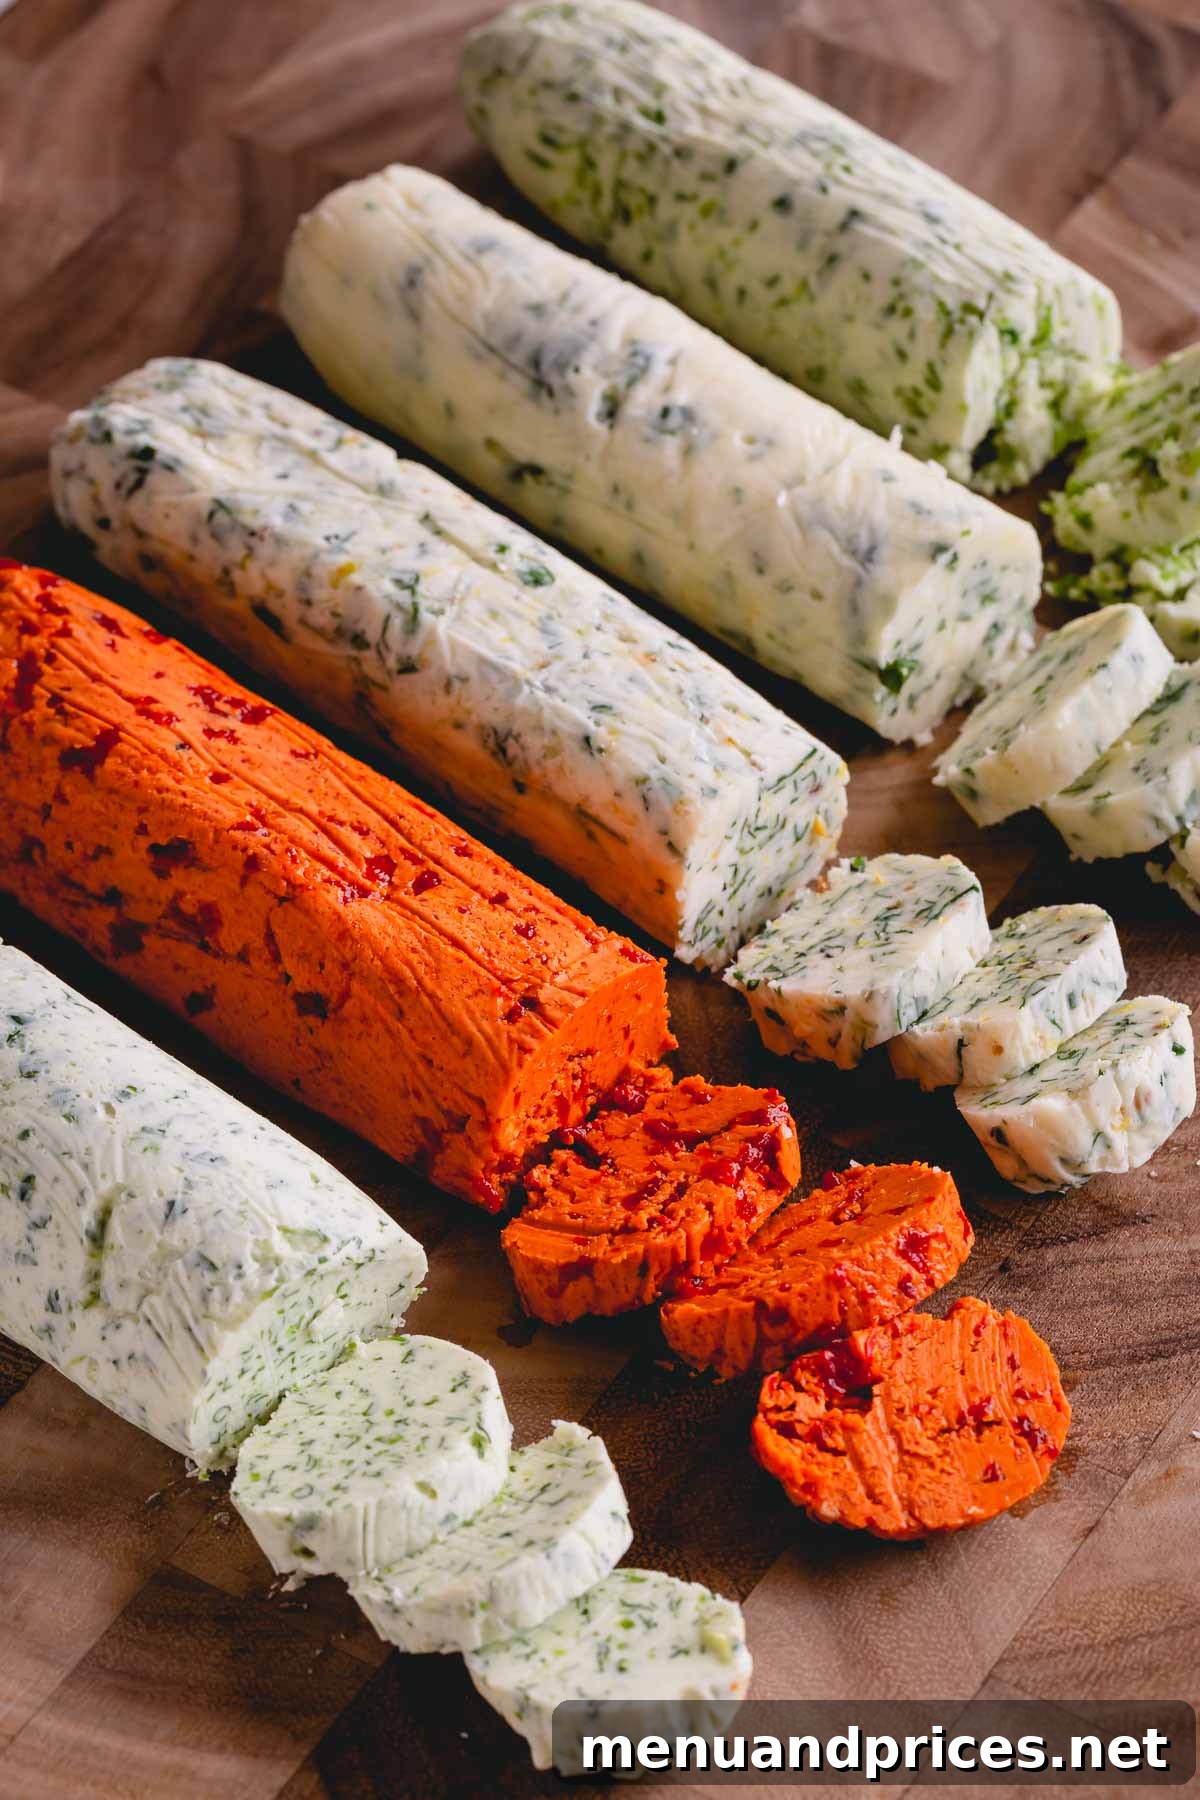
Storage and Shelf Life: Keeping Your Flavored Butter Fresh
Proper storage is essential to maintain the freshness and quality of your flavored butter, ensuring it’s ready whenever inspiration strikes:
- Refrigerator Storage: Store compound butter tightly wrapped in parchment paper (then sealed in an airtight container or a zip-top bag) in the refrigerator for up to 6-7 days. The shelf life can vary slightly depending on the freshness of your additions; butters with very fresh, un-cooked herbs might have a slightly shorter fridge life than those with dried spices or roasted elements. For a soft, spreadable consistency, remember to let your butter sit at room temperature for about 30 minutes before serving.
- Freezer Storage for Longevity: Compound butter is a fantastic candidate for freezing, allowing you to prepare it in advance or preserve seasonal flavors. Wrap shaped butter logs or individual molded portions tightly in plastic wrap, then place them in an airtight freezer-safe container or a heavy-duty freezer bag. Label clearly with the flavor and date. Frozen compound butter can maintain its quality for up to 6 months. To use, simply thaw the butter overnight in the refrigerator. For cooking, you can often slice off a round from a frozen log and add it directly to hot pans or dishes.
Unleash Flavor: Endless Culinary Uses for Compound Butter
The true magic of compound butter lies in its incredible versatility. Once you have a batch ready, you’ll find countless ways to effortlessly infuse gourmet flavor into nearly any dish. Here’s a comprehensive look at how to use both sweet and savory varieties:
Sweet Compound Butter Applications:
- Breakfast and Brunch Staples: Spread generously on warm toast, bagels, fresh-baked muffins, fluffy pancakes, crispy waffles, or delicate French toast. Imagine cinnamon-honey butter melting into a warm scone or a spiced fruit butter on a slice of banana bread.
- Baked Goods: Fold into muffin batters, scone dough, or sweet quick bread recipes to add moisture, richness, and a subtle hint of flavor.
- Dessert Enhancements: A dollop of fruit-infused or spiced butter can be a wonderful accompaniment to baked apples, roasted pears, sweet potatoes, or even a warm fruit crisp.
- Fruity Companions: Serve alongside a platter of fresh seasonal fruits for an unexpected and delightful sweet dip or spread.
Savory Compound Butter Applications:
- Steaks and Meats: The ultimate classic! Place a generous slice of herb or garlic butter on top of a freshly grilled, pan-seared, or roasted steak, lamb chop, or pork tenderloin. The butter melts, basting the meat in its infused goodness.
- Poultry Perfection: For an incredibly moist and flavorful chicken or turkey, gently rub herb butter under the skin before roasting. It creates a crispy, golden skin and succulent meat. Also fantastic simply added to cooked chicken breasts or thighs.
- Seafood Delights: A spoonful of lemon-dill, garlic-parsley, or chili-lime butter works wonders on baked salmon, grilled shrimp, pan-seared scallops, or steamed crab and lobster.
- Vegetable Transformations: Toss hot roasted vegetables (like broccoli, asparagus, carrots, green beans, or potatoes) with a knob of compound butter. It’s also exquisite melted over corn on the cob or stirred into sautéed mushrooms.
- Artisan Breads: Create the most incredible garlic bread by spreading savory compound butter on sliced baguettes, ciabatta, or dinner rolls before toasting or warming.
- Pasta and Grains: Stir a tablespoon of garlic-herb butter into hot cooked pasta with a splash of pasta water for a quick, flavorful sauce. It’s equally delicious swirled into white rice, cauliflower rice, quinoa, or polenta.
- Egg Dishes: Elevate scrambled eggs, omelets, or frittatas by swirling in a bit of compound butter during or after cooking.
- Soups and Sauces: Whisk a small amount of savory compound butter into finished soups or pan sauces just before serving to add richness, body, and a boost of flavor.
- Sandwiches and Wraps: Use as a flavorful spread in savory sandwiches instead of plain butter, mayonnaise, or mustard for an extra layer of taste.
Inspiring Flavor Variations for Your Compound Butter Creations
The beauty of flavored butter lies in its limitless potential for customization. Here are several exciting combinations to spark your imagination, along with a reminder for creating your own unique blends:
- Cinnamon Sugar Butter: A beloved sweet blend, perfect for breakfast pastries. Combine 1/2 cup softened unsalted butter with 1 1/2 teaspoons ground cinnamon and 1/4 cup powdered sugar. Excellent on toast, pancakes, or baked sweet potatoes.
- Cranberry Orange Butter: A festive and bright option, wonderful for holiday baking or roasted poultry. Mix 1/2 cup softened unsalted butter with 3 tablespoons finely chopped dried cranberries, 1 teaspoon fresh orange zest, and 1 tablespoon honey.
- Blue Cheese Butter: A robust and intensely savory butter, outstanding for enhancing grilled steaks, burgers, or even roasted vegetables. Combine 1/2 cup softened unsalted butter with 1/2 cup crumbled blue cheese and 1/4 teaspoon kosher salt.
- Sundried Tomato Butter: Infused with Mediterranean flair, this butter is fantastic with pasta, grilled chicken, or spread on crusty bread. Mix 1/2 cup softened unsalted butter with 1/4 cup finely chopped oil-packed sun-dried tomatoes (drained) and 1/4 teaspoon kosher salt.
- Chipotle Lime Butter: A smoky and zesty combination, ideal for grilled fish, chicken tacos, or slathered on warm corn on the cob. Mix 1/2 cup softened unsalted butter with 1 teaspoon chipotle chili powder, 1/4 teaspoon kosher salt, and 1 teaspoon fresh lime zest.
- Honey Butter: A classic sweet and creamy spread that is incredibly versatile. Whip 1/2 cup softened unsalted butter with 1/3 cup honey until light and fluffy. Perfect for cornbread, biscuits, or hot rolls.
- Roasted Garlic & Rosemary Butter: A deeply aromatic and savory blend. Roast 4-5 cloves of garlic until soft, mash them, and combine with 1/2 cup softened unsalted butter, 1 tablespoon finely chopped fresh rosemary, and a pinch of kosher salt. A magnificent choice for roasted lamb, potatoes, or garlic bread.
- Lemon Dill Butter: Bright, fresh, and herbaceous, this is a quintessential pairing for all types of seafood. Combine 1/2 cup softened unsalted butter with 1 tablespoon fresh dill, 1 teaspoon fresh lemon zest, a small squeeze of fresh lemon juice, and a pinch of kosher salt.
- Spicy Calabrian Chili Butter: For those who love heat. Combine 1/2 cup softened butter with 1-2 teaspoons of finely minced Calabrian chili paste or finely chopped fresh red chilies, 1 small minced garlic clove, and a pinch of salt. Great on pizza crust, pasta, or grilled vegetables.
When you venture into creating your own unique butter variations, always start with smaller quantities of potent ingredients like strong spices, chilies, or intensely flavored herbs. You can always add more mix-ins to achieve the desired intensity, but it’s impossible to remove them once incorporated. Trust your palate, taste as you go, and let your creativity flourish!
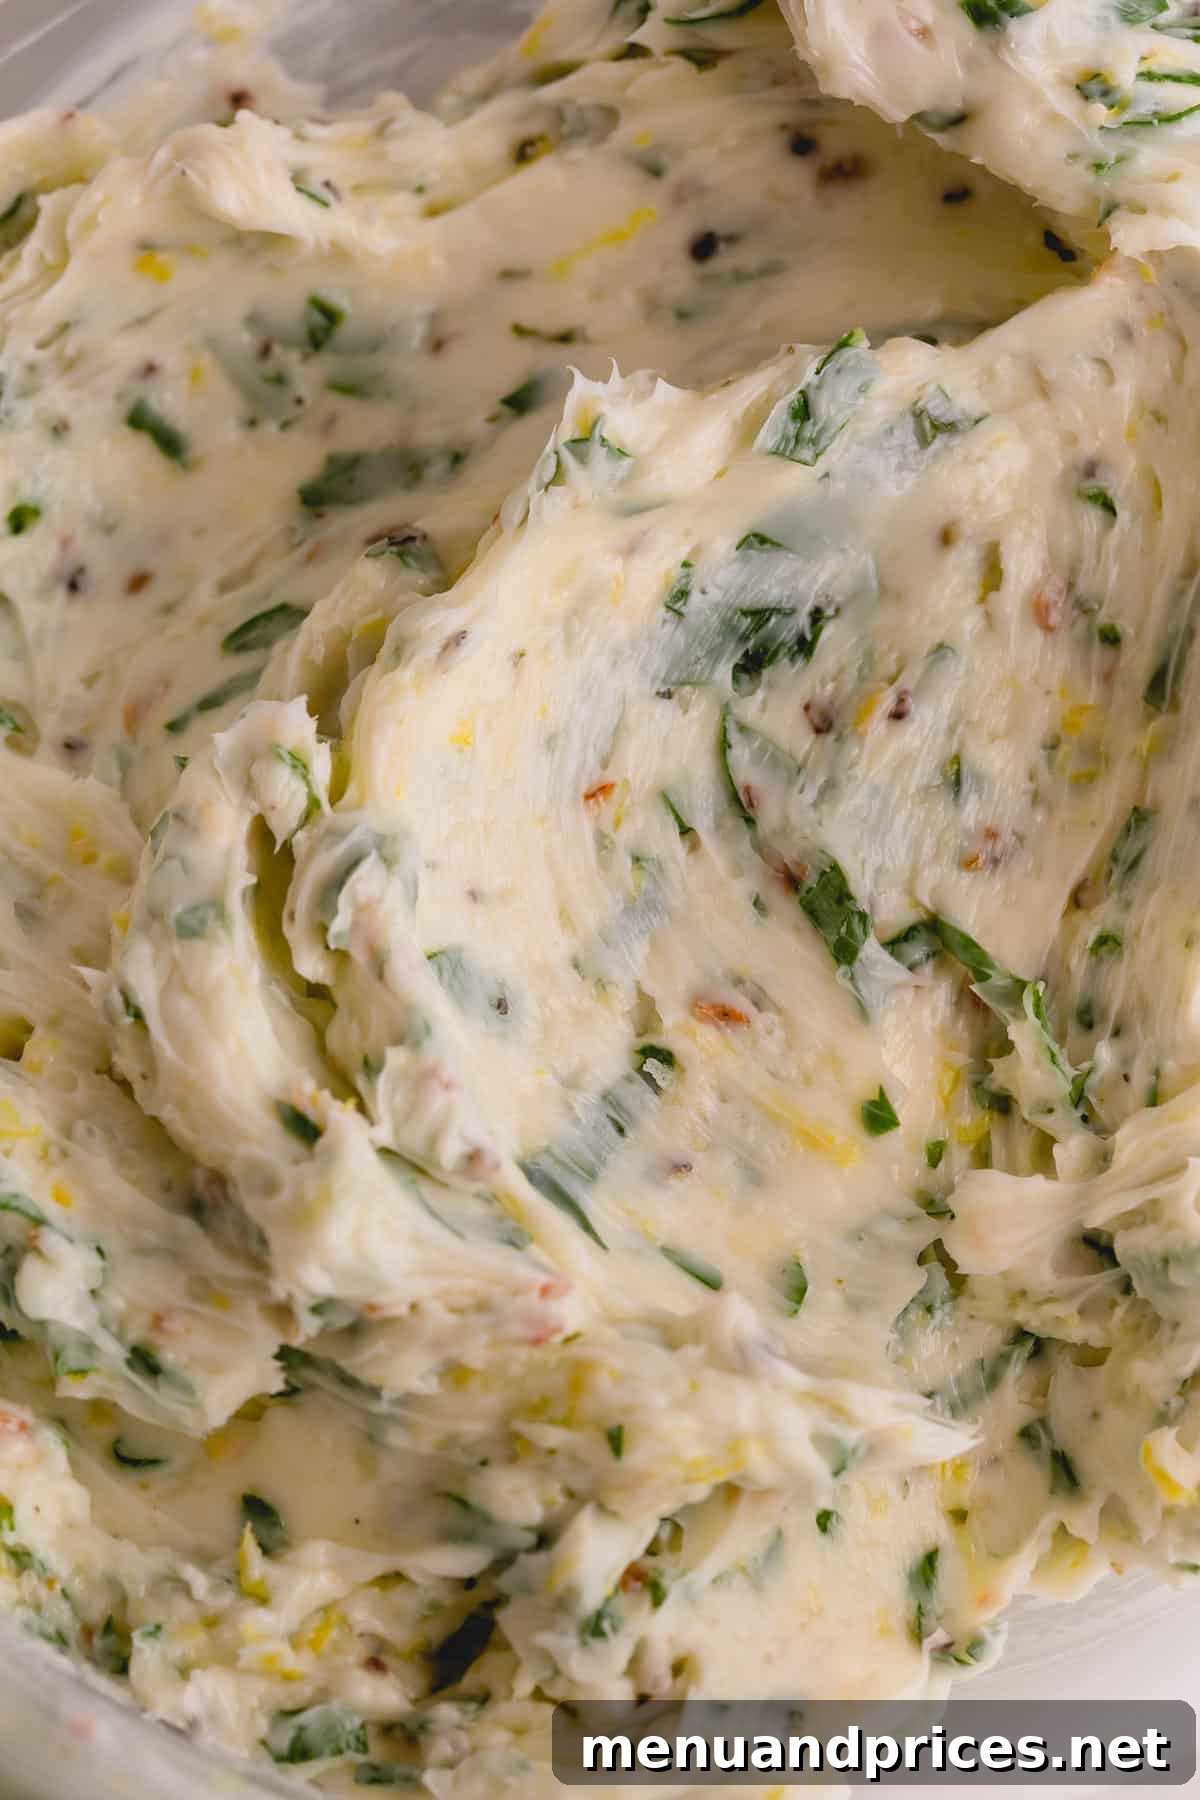
How to Make Compound Butter: Essential Recipes
Shinee Davaakhuu
Elevate any meal with these incredibly easy compound butter recipes. From aromatic cilantro ginger garlic to zesty parsley lemon, these flavored butters are perfect for enhancing roasted fish, meats, vegetables, and more. Prepare them in minutes and store for future gourmet touches!
10 mins
0 mins
10 mins
8
Ingredients
Cilantro Ginger Garlic Compound Butter
- ½ cup (115 g) unsalted butter, at room temperature Note 1
- 2 tablespoons fresh chopped cilantro
- 2 teaspoons grated garlic (about 2 cloves) Note 2
- 2 teaspoons grated ginger (about 2-inch piece)
- 1 teaspoon coarse kosher salt
Cilantro Lime Garlic Compound Butter
- ½ cup (115 g) unsalted butter, at room temperature
- 2 tablespoons fresh chopped cilantro
- 2 teaspoons grated garlic (about 2 cloves)
- 2 teaspoons fresh lime zest
- 1 teaspoon coarse kosher salt
Parsley Garlic Lemon Compound Butter
- ½ cup (115 g) unsalted butter, at room temperature
- 2 tablespoons fresh chopped parsley
- 2 teaspoons grated garlic (about 2 cloves)
- 1 teaspoon fresh lemon zest
- 1 teaspoon coarse kosher salt
- 1 teaspoon lemon pepper
Roasted Red Pepper Compound Butter
- 4 tablespoons chopped roasted bell pepper (drained, about 70g or ¼ cup) Note 3
- ½ cup (115 g) unsalted butter, at room temperature
- 2 teaspoons smoked paprika
- 1 teaspoon coarse kosher salt
Equipment
- medium mixing bowl(s)
- food processor or mini food chopper (optional, for some methods)
- spoon or spatula
- parchment paper or wax paper
Instructions
General Mixing Instructions (for all butter flavors unless specified):
-
In a medium bowl, combine the softened unsalted butter with the chopped herbs, grated aromatics (garlic, ginger), zests, and salt specific to your chosen flavor variation.
-
Using a spoon or spatula, mix until all ingredients are thoroughly combined and evenly distributed. Ensure no plain butter streaks remain.
-
Alternatively, for a finer texture or larger batches, you can process the solid mix-ins (like cilantro, ginger, garlic, or roasted pepper) in a small food processor until finely minced. Then add the softened butter and other ingredients, pulsing a few times until just combined. Be careful not to over-process.
Specific Instructions for Roasted Red Pepper Compound Butter:
-
In a small food processor, process the drained roasted red pepper until it forms a smooth paste.
-
Add the softened butter, smoked paprika, and salt to the food processor. Pulse for a few seconds until everything is well combined and the butter is uniformly colored.
To Shape Compound Butter into a Log:
-
Spread a piece of parchment paper (or wax paper) on your counter. Spoon the prepared compound butter into a rough log shape in the center.
-
Using the paper, roll the butter into a tight, uniform log. Twist the ends of the paper to seal and firm the log. Refrigerate until firm (at least 2 hours).
To Freeze Compound Butter:
-
Once the log is firm, you can slice it into individual rounds if desired for easier portioning. Re-wrap the slices or the entire log tightly in plastic wrap or parchment paper, then place in a freezer-safe bag or airtight container. Freeze for up to 6 months.
-
Thaw overnight in the refrigerator before serving, or use frozen slices directly in hot dishes like pan-seared meats or vegetables.
⭐️ Did you make this recipe? We’d love your feedback and review!
Tips & Notes
Note 1: Unsalted Butter Preference: I highly recommend using unsalted butter to maintain full control over the saltiness of your compound butter. If you choose to use salted butter, please adjust or omit any additional salt specified in the recipe to avoid over-seasoning.
Note 2: Fresh Garlic & Ginger: For the most vibrant and aromatic flavor, always opt for freshly grated garlic and ginger. Pre-minced varieties often lack the potency and complexity found in their fresh counterparts.
Note 3: Roasted Bell Pepper Preparation: When using jarred roasted red peppers, it is crucial to drain them thoroughly of any excess liquid before chopping and measuring. For this recipe, aim for approximately 70g (2.5oz) or about ¼ cup of well-drained peppers.
Storing Tip:
– Store your compound butter in an airtight container or tightly wrapped in the refrigerator for up to 6 days. To achieve a soft, spreadable consistency, allow the butter to sit at room temperature for at least 30 minutes before serving.
– For extended storage, compound butter freezes beautifully. Place it into an airtight freezer-safe container and freeze for up to 6 months. Thaw overnight in the refrigerator before use.
Nutrition
Servings: 1 tablespoon
Calories: 103 kcal
Carbohydrates: 1 g
Protein: 1 g
Fat: 12 g
Sugar: 1 g
Sodium: 382 mg
Condiments, Garnish, Spread
American, Global
Did you make this? Leave a rating and your feedback. Thank you!