
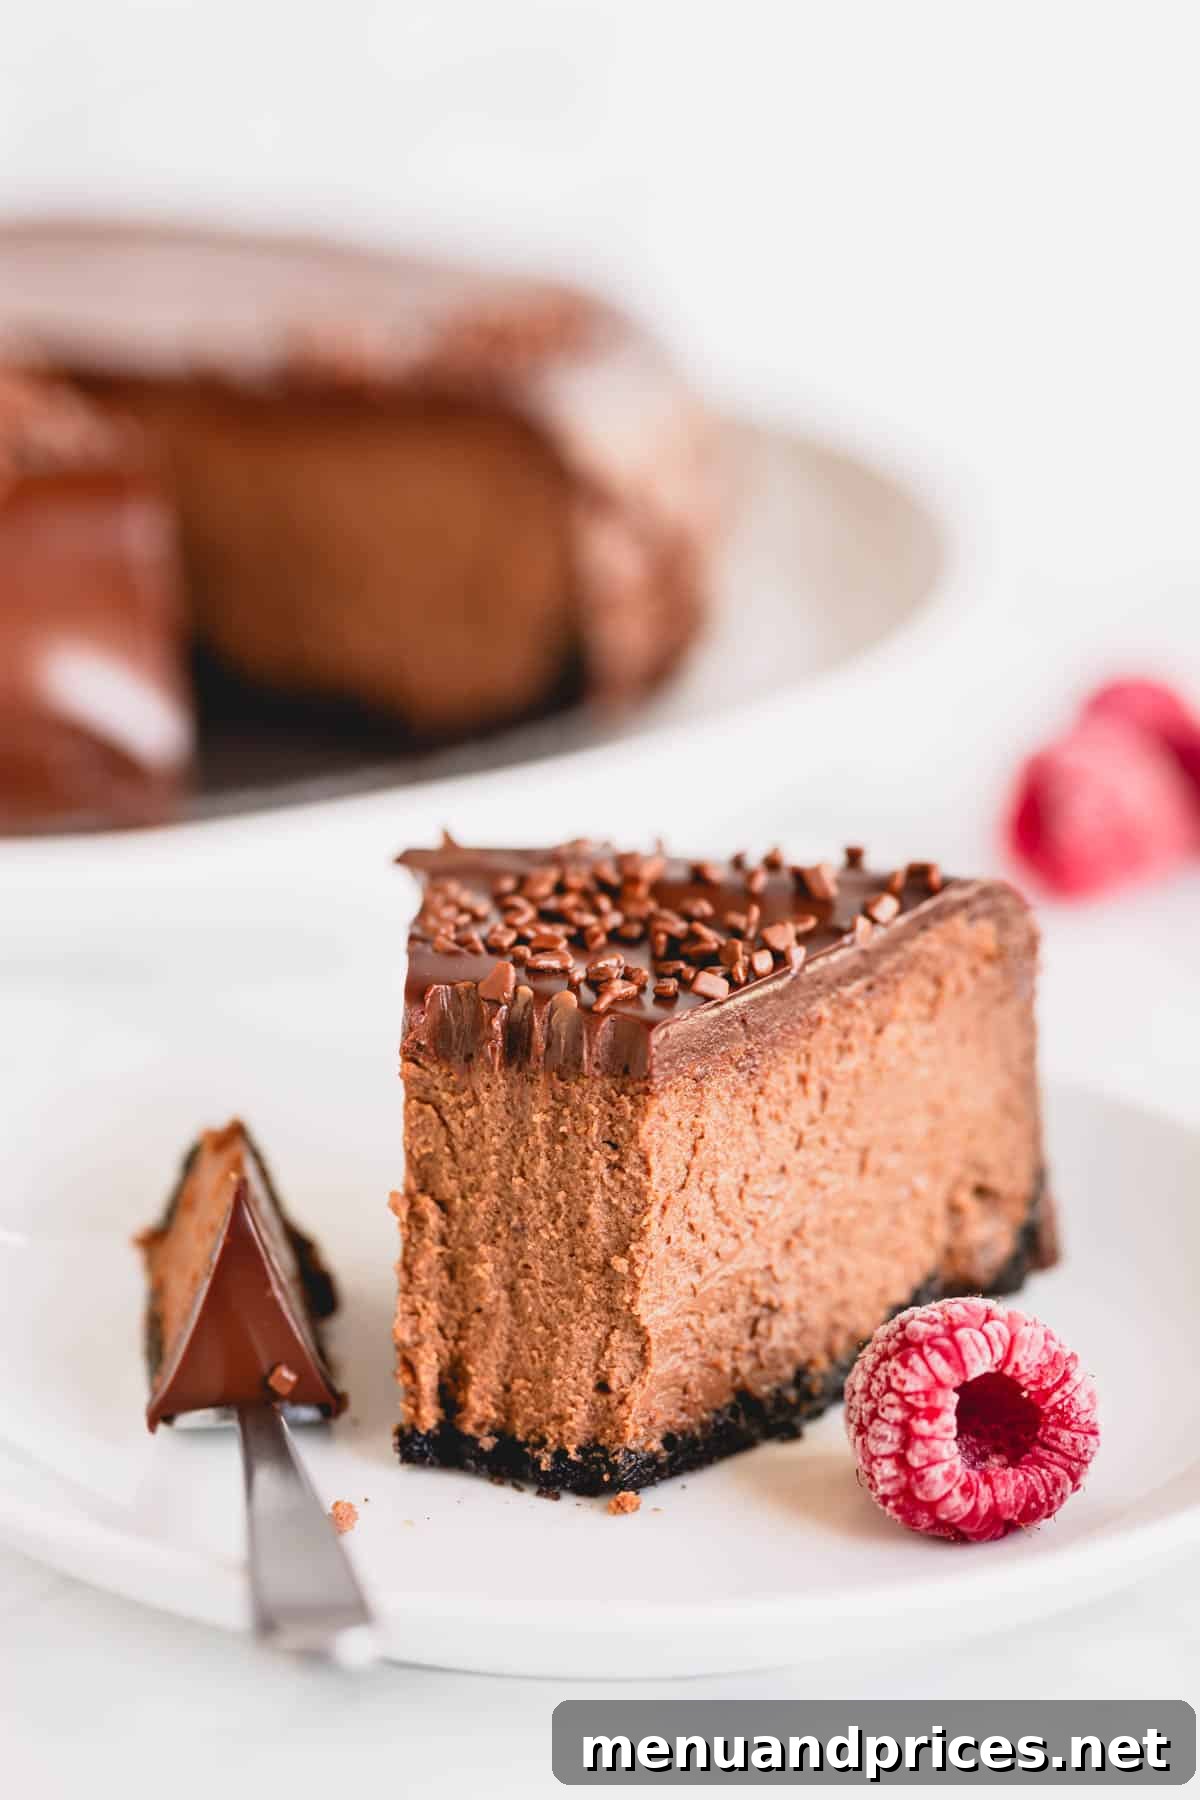
The Ultimate Supreme Chocolate Cheesecake: A Decadent Homemade Delight
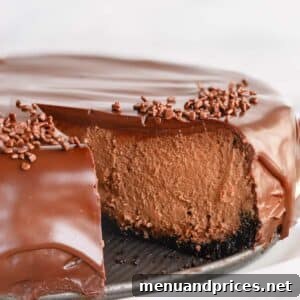
Prepare to embark on a culinary journey into the world of pure chocolate bliss with this Supreme Chocolate Cheesecake recipe. Imagine the luxurious indulgence of a rich chocolate truffle, now perfected in the form of an ultra-creamy, smooth cheesecake. This isn’t just a dessert; it’s an experience, a showstopper that consistently wows crowds and leaves a lasting impression. What’s truly surprising is how approachable this seemingly elaborate creation is, even for novice bakers. With our detailed guidance, you’re not just making a cheesecake; you’re crafting a masterpiece that tastes like it came from the finest patisserie.
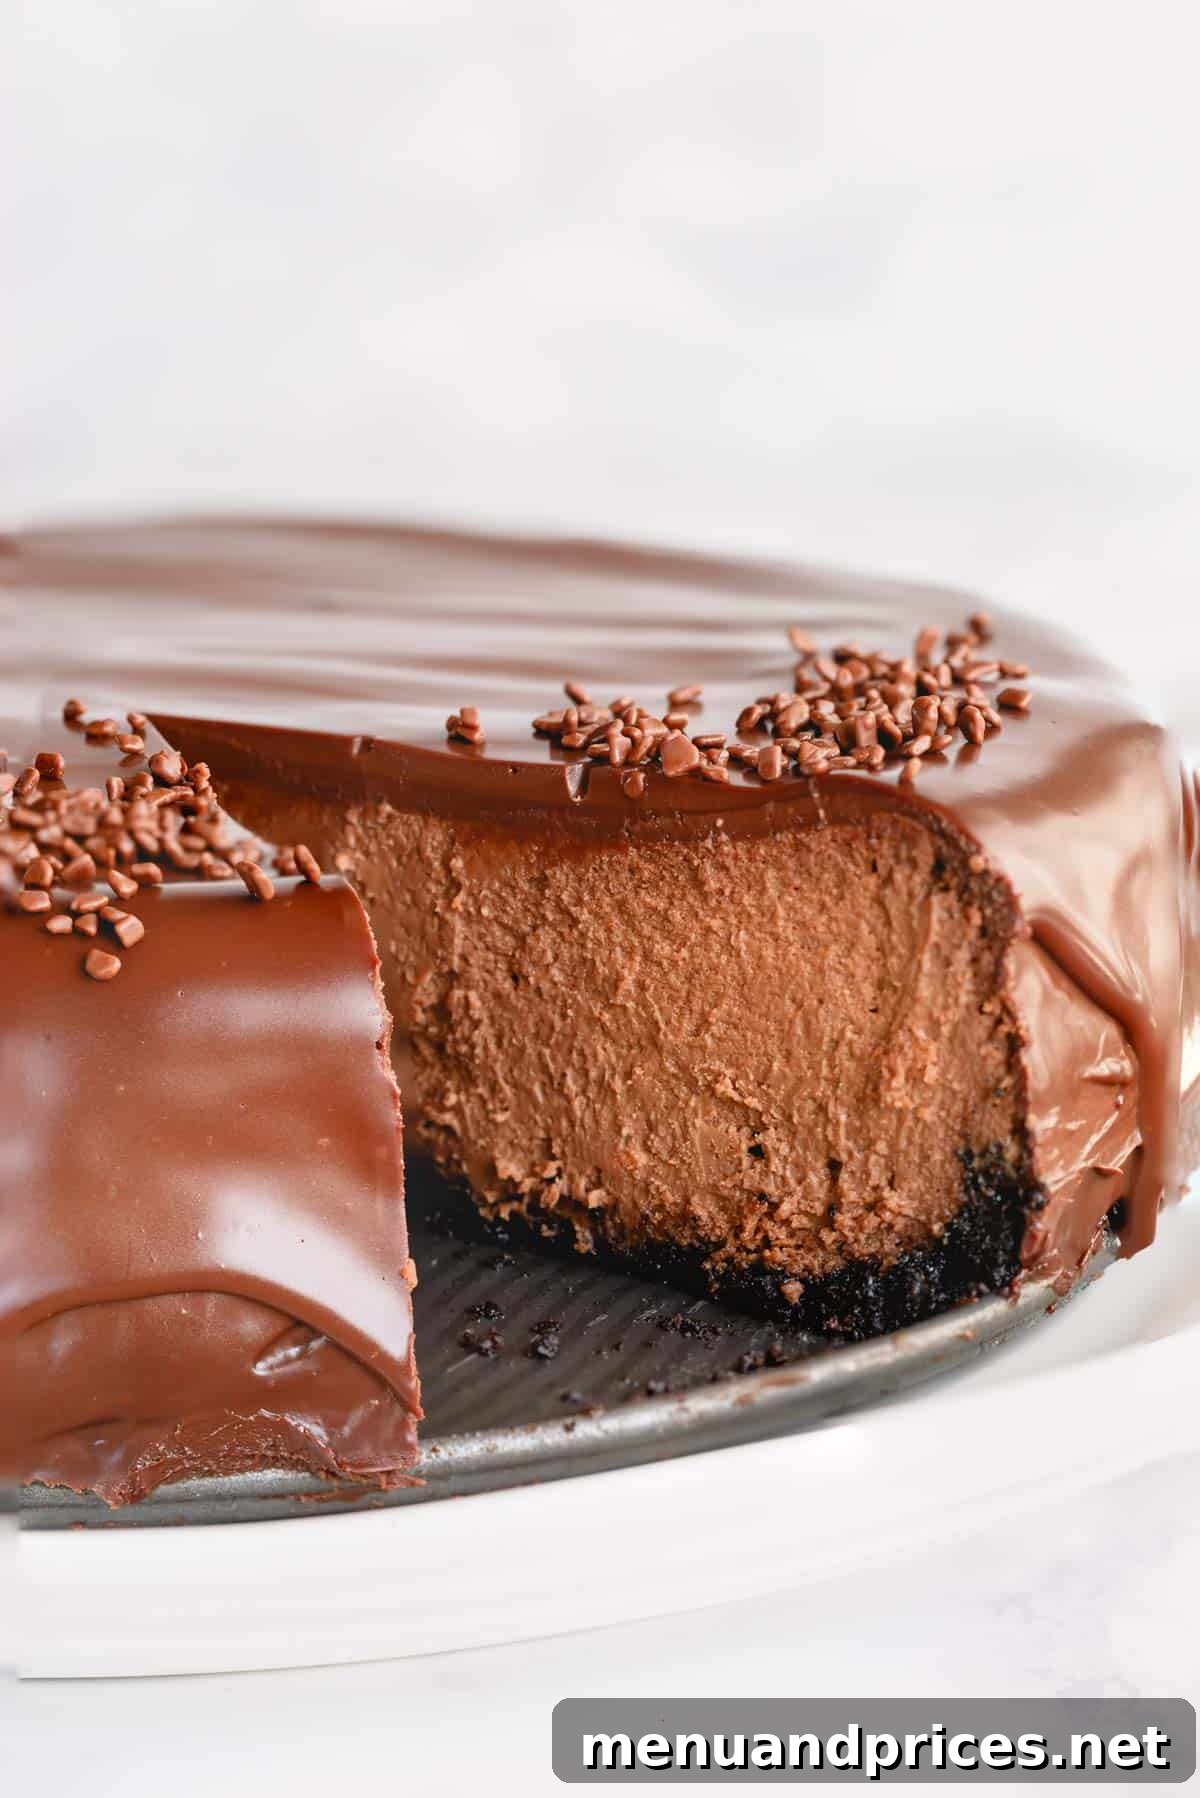
Pin this recipe now to easily find it later!
Pin It
Why This Chocolate Cheesecake Recipe Will Become Your New Favorite
For those who cherish chocolate as much as we do, this recipe represents the pinnacle of dessert perfection. When the deep, complex notes of chocolate merge with an exquisitely creamy, condensed milk-infused cheesecake, the result is nothing short of irresistible. This isn’t just another cheesecake; it’s *the* chocolate cheesecake you’ve been dreaming of, offering a symphony of textures and flavors in every bite.
- Unforgettable Flavor Profile: Our journey to chocolate nirvana begins with a classic, rich Oreo cookie crust, providing a delightful crunch and a foundational layer of cocoa goodness. This paves the way for the star of the show: a velvety, intensely chocolatey cheesecake filling. Finally, it’s crowned with a luxurious, silky smooth chocolate ganache, creating three distinct yet harmonious layers of rich, deep chocolate flavor that will captivate your palate. Each element is carefully balanced to deliver a sweet, decadent experience without being overly heavy.
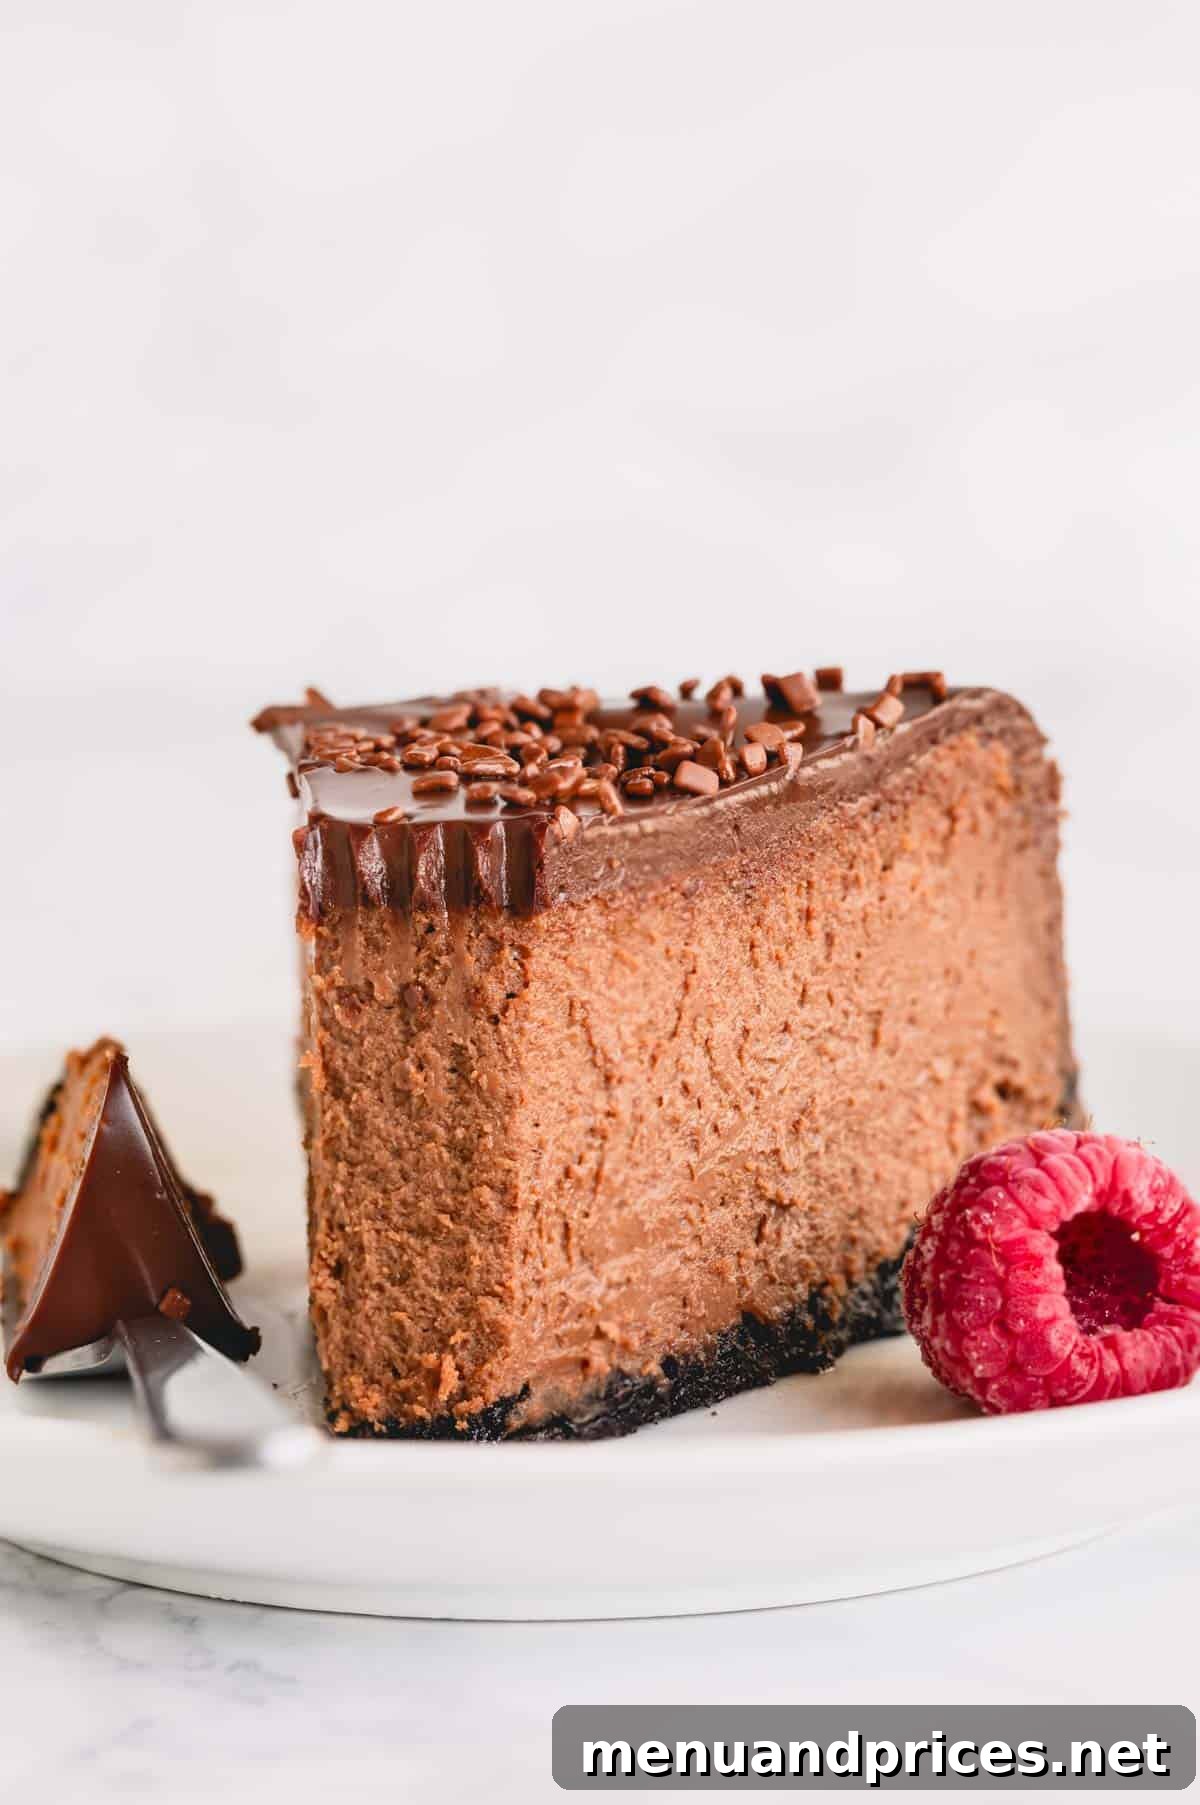
- Luxurious Texture: Prepare for a multi-sensory experience. This chocolate cheesecake boasts a perfect harmony of textures – it’s incredibly rich, unbelievably creamy, beautifully moist, and satisfyingly dense. The crispness of the Oreo crust gives way to the smooth, melt-in-your-mouth filling, all topped by the luscious, slightly firm ganache. It’s a textural masterpiece that ensures every forkful is a pure delight.
- Surprisingly Approachable for All Skill Levels: Don’t let the “supreme” in its name intimidate you! We understand that making a cheesecake from scratch might seem daunting, but we’ve meticulously perfected this recipe to be incredibly straightforward. We’ll guide you through each simple step with clear instructions and provide all our expert tips and tricks along the way. Our goal is to empower you to achieve guaranteed success, yielding a professional-quality dessert right in your own kitchen. You’ll be amazed at how easy it is to create such an extraordinary treat.
While we appreciate cheesecakes of all varieties, from light and airy to fruity and tangy, this particular chocolate rendition stands out as an absolute favorite. It literally takes the cake, offering a depth of flavor and a creamy consistency that far surpasses anything you’d find at a commercial establishment. Once you taste this homemade wonder, you may never look at store-bought cheesecakes the same way again.
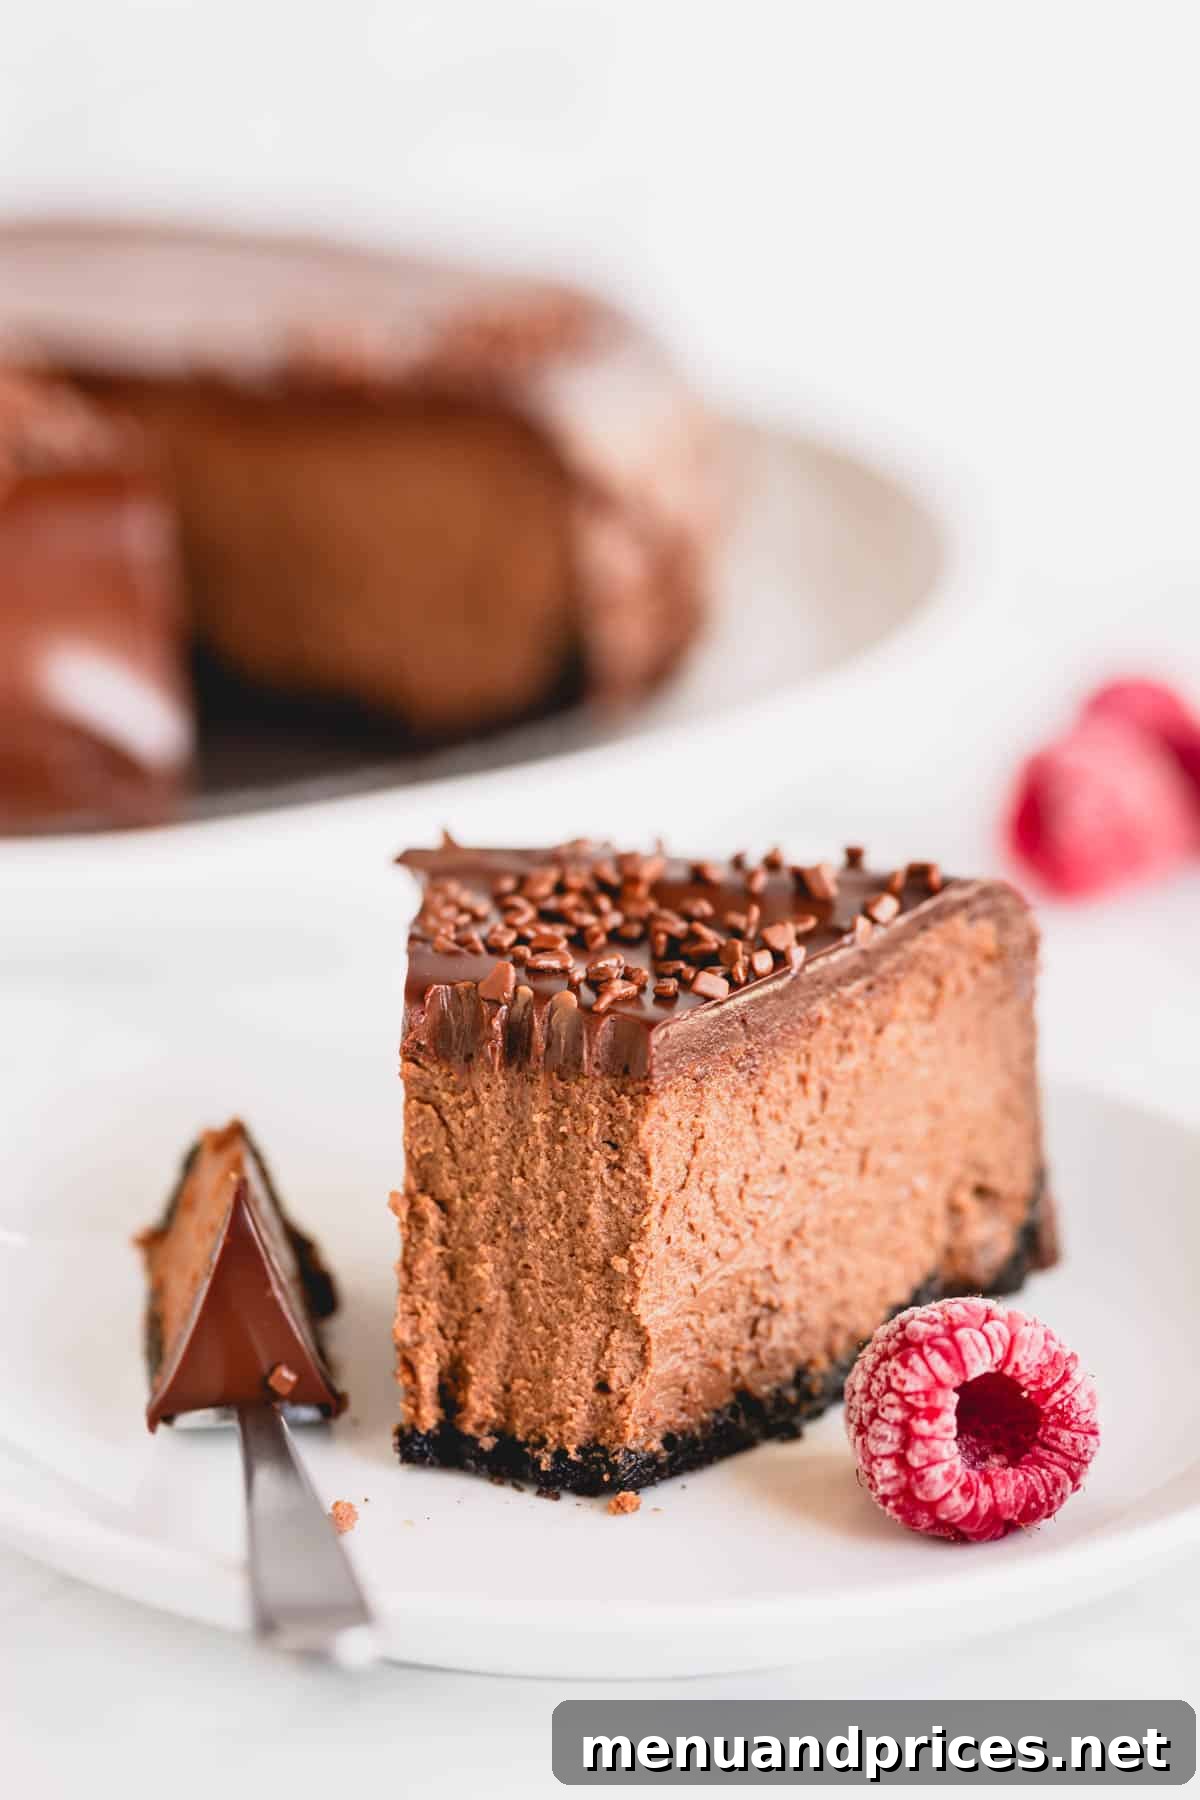
Mastering the Ingredients: Your Guide to a Flawless Chocolate Cheesecake
Every exceptional recipe starts with quality ingredients and a keen understanding of their role. Here’s a detailed breakdown of what you’ll need and why each component is crucial for achieving the perfect Supreme Chocolate Cheesecake.
For the Irresistible Oreo Crust:
- Oreo Cookies: The foundation of our cheesecake, these chocolate sandwich cookies provide a dark, rich, and slightly bitter counterpoint to the sweet filling. You’ll need about 1.5 cups of finely crumbled cookies, which usually translates to roughly 18 standard Oreo cookies. The chocolate wafers and creamy filling both contribute to the unique flavor and texture of the crust.
- Unsalted Butter: Melted unsalted butter is the binding agent that holds the cookie crumbs together, ensuring a firm, yet tender crust that won’t crumble apart when sliced. It also adds a delightful richness and a hint of buttery flavor that complements the chocolate beautifully. Using unsalted butter allows you to control the overall saltiness of the dessert.
For the Velvety Chocolate Filling:
- Semi-Sweet Chocolate Chips: These are melted and incorporated directly into the batter, providing the primary chocolate flavor and a beautiful, smooth texture. Semi-sweet chocolate offers a balanced sweetness that prevents the cheesecake from becoming overly rich. If you prefer a bolder, deeper chocolate intensity, you can certainly substitute with high-quality dark chocolate chips or finely chopped baking chocolate.
- Full-Fat Cream Cheese: This is the backbone of any classic cheesecake. It’s imperative to use full-fat, plain block-style cream cheese (such as Philadelphia cream cheese). Avoid whipped, low-fat, or spreadable varieties, as they contain added water and stabilizers that will alter the consistency and richness of your cheesecake. Crucially, ensure your cream cheese is at **room temperature**. This is non-negotiable for a lump-free, silky smooth batter. Allow at least 1-2 hours on the counter for it to soften properly.
- Sweetened Condensed Milk: Our secret weapon for achieving an unbelievably ultra-creamy, luscious, and dense filling. This thick, sweet milk adds both moisture and richness that distinguishes this cheesecake. Be careful not to confuse it with evaporated milk, which is unsweetened and will not yield the same results. Condensed milk provides that perfect touch of sweetness and unparalleled smoothness.
- Large Eggs: Eggs act as an emulsifier and a setting agent, contributing to the cheesecake’s structure and creamy texture. Like the cream cheese, it’s vital that your eggs are at **room temperature**. This helps them incorporate more easily and evenly into the batter, preventing overmixing and ensuring a smooth, consistent filling. Cold eggs can cause the batter to seize and become lumpy.
- Sour Cream: A touch of full-fat sour cream adds a subtle, pleasant tanginess that beautifully cuts through the richness of the chocolate and cream cheese, creating a more complex flavor profile. It also contributes to the overall moistness and incredibly creamy texture. Again, room temperature sour cream is best for seamless incorporation.
- All-Purpose Flour: Just a small amount of all-purpose flour plays a significant role as a thickening agent. It helps to stabilize the batter, creating a perfectly smooth filling and acting as a safeguard against common cheesecake woes like cracking during baking. It helps create a more uniform texture.
- Instant Espresso Powder: Don’t skip this ingredient! Instant espresso powder is a chocolate’s best friend. It doesn’t make your cheesecake taste like coffee; instead, it magically enhances and deepens the natural chocolate flavor, making it taste even more intensely chocolatey and sophisticated. You can use decaf espresso powder if you prefer to avoid caffeine.
- Pure Vanilla Extract: A high-quality pure vanilla extract is essential for adding depth, warmth, and balance to the rich flavors. It complements the chocolate and cream cheese beautifully. While homemade vanilla extract is always a treat, a good store-bought pure extract works perfectly.
- Salt: A pinch of salt might seem counterintuitive in a sweet dessert, but it’s a fundamental flavor enhancer. It brightens and balances all the other ingredients, bringing out the best in the chocolate and cream cheese.
For the Decadent Ganache Topping:
- Heavy Whipping Cream: This is absolutely crucial for achieving the correct velvety, pourable consistency of ganache. The high fat content of heavy cream is essential for creating a stable emulsion with the chocolate. Do not substitute with lighter alternatives like milk, half-and-half, or light cream, as their lower fat content will throw off the delicate balance and prevent the ganache from setting properly.
- Semi-Sweet Chocolate Chips: Similar to the filling, semi-sweet chocolate chips provide a balanced richness for the ganache. For an even more intense and slightly less sweet topping, you can opt for dark chocolate. Ensure you use good quality chocolate for the best flavor and smoothest texture. Finely chopped chocolate melts more evenly than whole chips.
Step-by-Step Guide: Crafting Your Supreme Chocolate Cheesecake
Creating this magnificent chocolate cheesecake is a rewarding process. Follow these detailed steps carefully, and you’ll be enjoying a slice of heaven in no time. Before you begin, remember to preheat your oven to 350°F (177°C).
1. Prepare the Perfect Oreo Cookie Crust
A sturdy and flavorful crust is the foundation of a great cheesecake. This Oreo crust adds a wonderful chocolatey base and a satisfying crunch.
- Prepare the Pan: Start by wrapping a 9-inch springform pan with two layers of heavy-duty aluminum foil. This creates a protective barrier, preventing any water from seeping into your cheesecake if you use a water bath during baking (a common and recommended method for even baking and preventing cracks). For a visual guide on this important step, you can refer to our pecan pie cheesecake recipe.
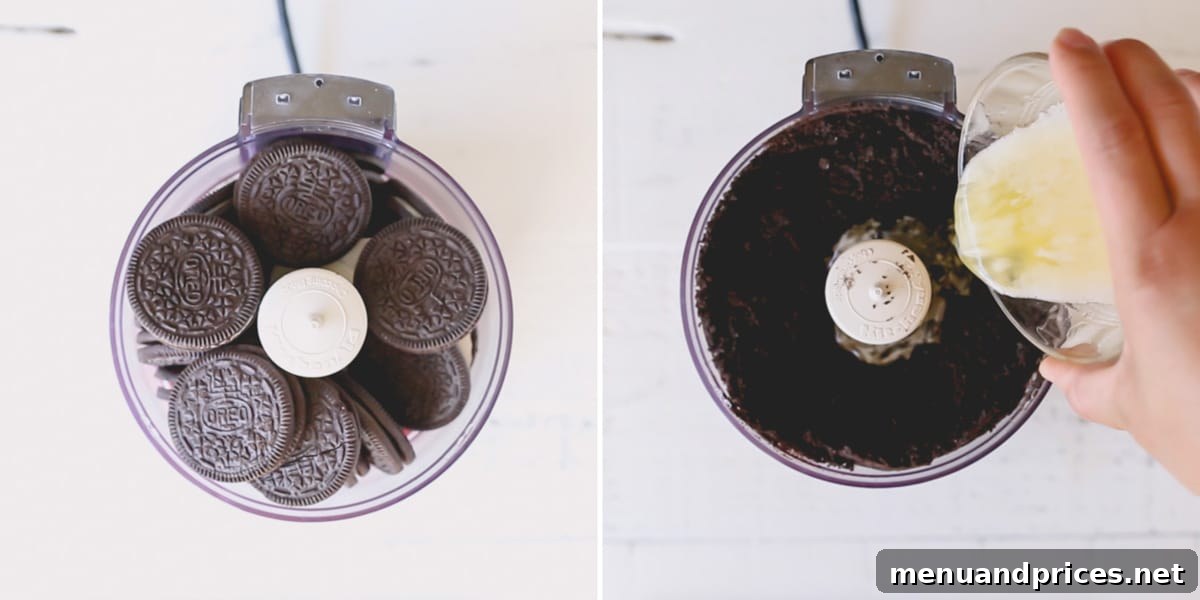
- Crush the Cookies: In a small food processor, pulse the Oreo cookies until they form fine, even crumbs. You want a consistent texture, almost like sand, to ensure the crust holds together well.
- Combine with Butter: Pour the melted unsalted butter over the cookie crumbs. Stir thoroughly, ensuring every crumb is moistened and coated with butter. This is crucial for the crust to bind properly.
- Press and Bake: Firmly press the mixture into the bottom of your prepared springform pan. Use the back of a spoon or the bottom of a flat glass to compact it evenly. Bake the crust for 10 minutes. This slight pre-baking helps to set the crust, making it crispier and preventing it from becoming soggy once the filling is added.
2. Crafting the Silky Smooth Chocolate Cheesecake Batter
The key to an incredible cheesecake lies in its batter – smooth, creamy, and free of lumps. Patience and proper ingredient temperatures are your allies here.
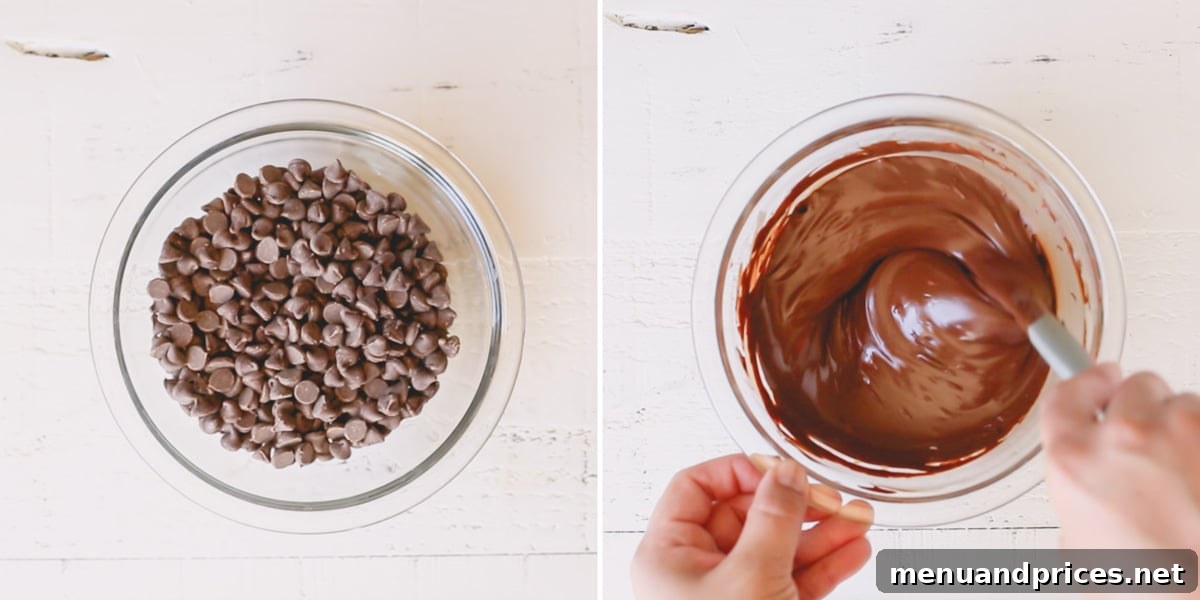
- Melt the Chocolate: Gently melt the semi-sweet chocolate chips until they are completely smooth and fluid. The microwave is an excellent tool for this: start with 1 minute at 50% power, stir well, then microwave in 15-second intervals at 50% power, stirring after each, until fully melted and smooth. Be careful not to overheat the chocolate, as it can seize or burn.
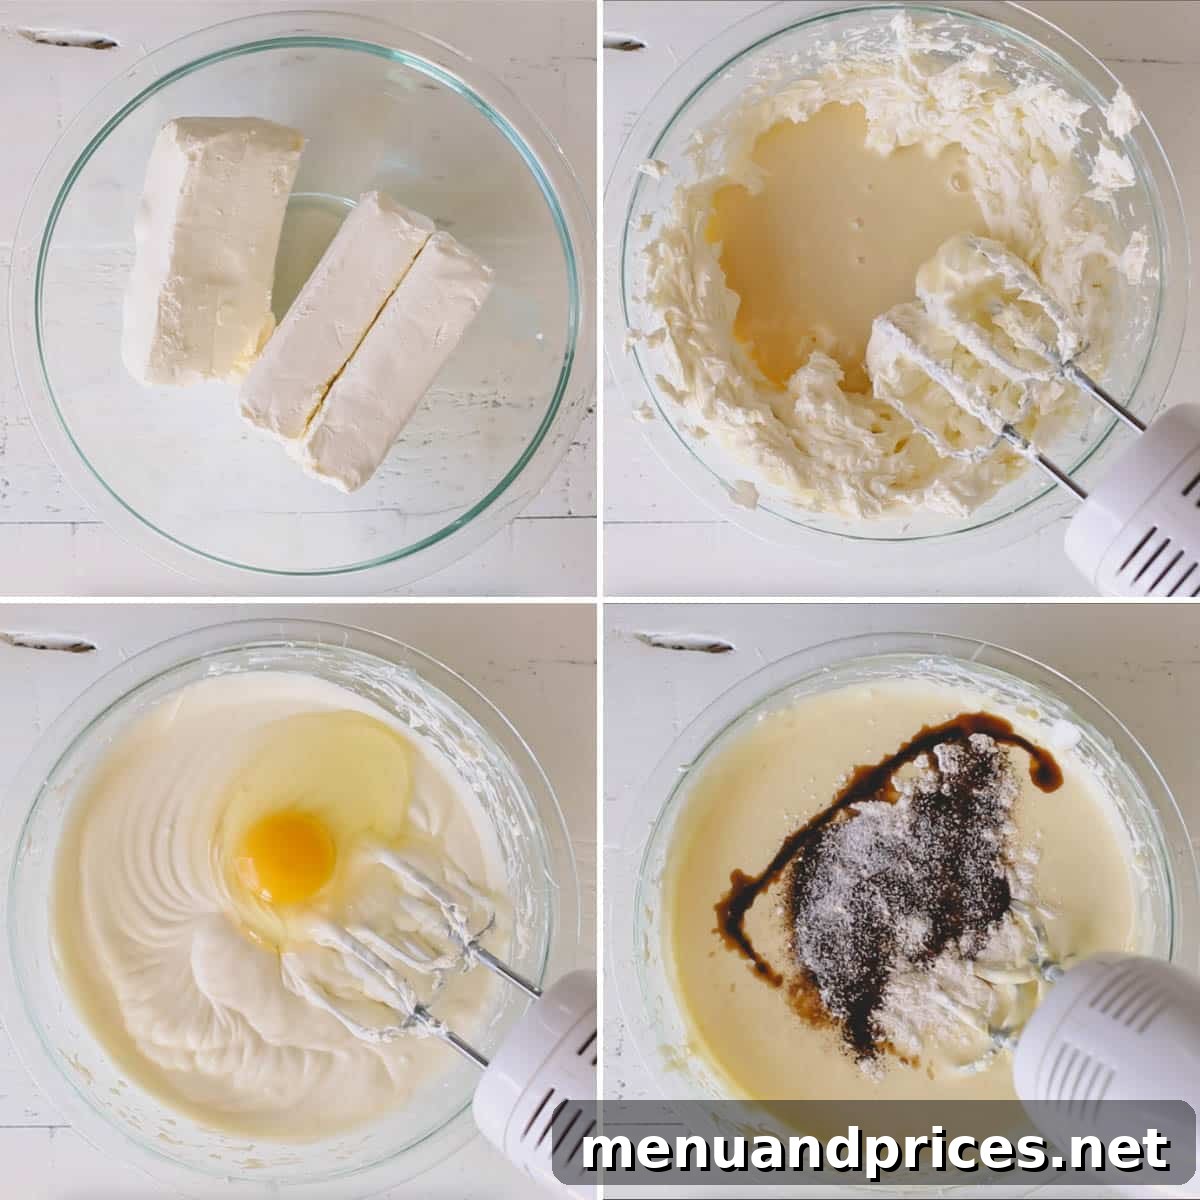
- Whip the Cream Cheese: In a large mixing bowl, using a whisk attachment (or an electric mixer), beat the room temperature cream cheese until it is incredibly light, fluffy, and completely smooth. This step is crucial for aerating the cream cheese and ensuring a lump-free batter.
- Add Condensed Milk: Gradually add the sweetened condensed milk to the fluffy cream cheese, beating until the mixture is thoroughly combined and smooth. Scrape down the sides of the bowl as needed to ensure everything is incorporated.
- Incorporate Eggs Gently: Add the room temperature eggs one at a time, beating just until each egg is incorporated before adding the next. Avoid overbeating here, as incorporating too much air can lead to cracks in your finished cheesecake. The goal is just to combine.
- Stir in Sour Cream: Gently fold in the room temperature sour cream. This adds another layer of creaminess and that signature subtle tang.
- Sift Dry Ingredients: In a separate small bowl, whisk together the all-purpose flour, instant espresso powder, pure vanilla extract, and salt. Sifting them together ensures they are evenly distributed and helps prevent lumps in the batter.
- Combine Wet and Dry: Slowly add the sifted dry ingredients into the wet ingredients, mixing on low speed until just combined. Be careful not to overmix at this stage.
Pro Tip: Avoid Lumps for the Smoothest Batter!
The single most important factor for a silky-smooth, lump-free cheesecake batter is ensuring your cream cheese (and eggs and sour cream!) are at perfect room temperature. If your cream cheese is cold, it will resist blending evenly, resulting in a chunky, undesirable batter. Plan ahead and take these ingredients out of the refrigerator at least 1-2 hours before you start baking.
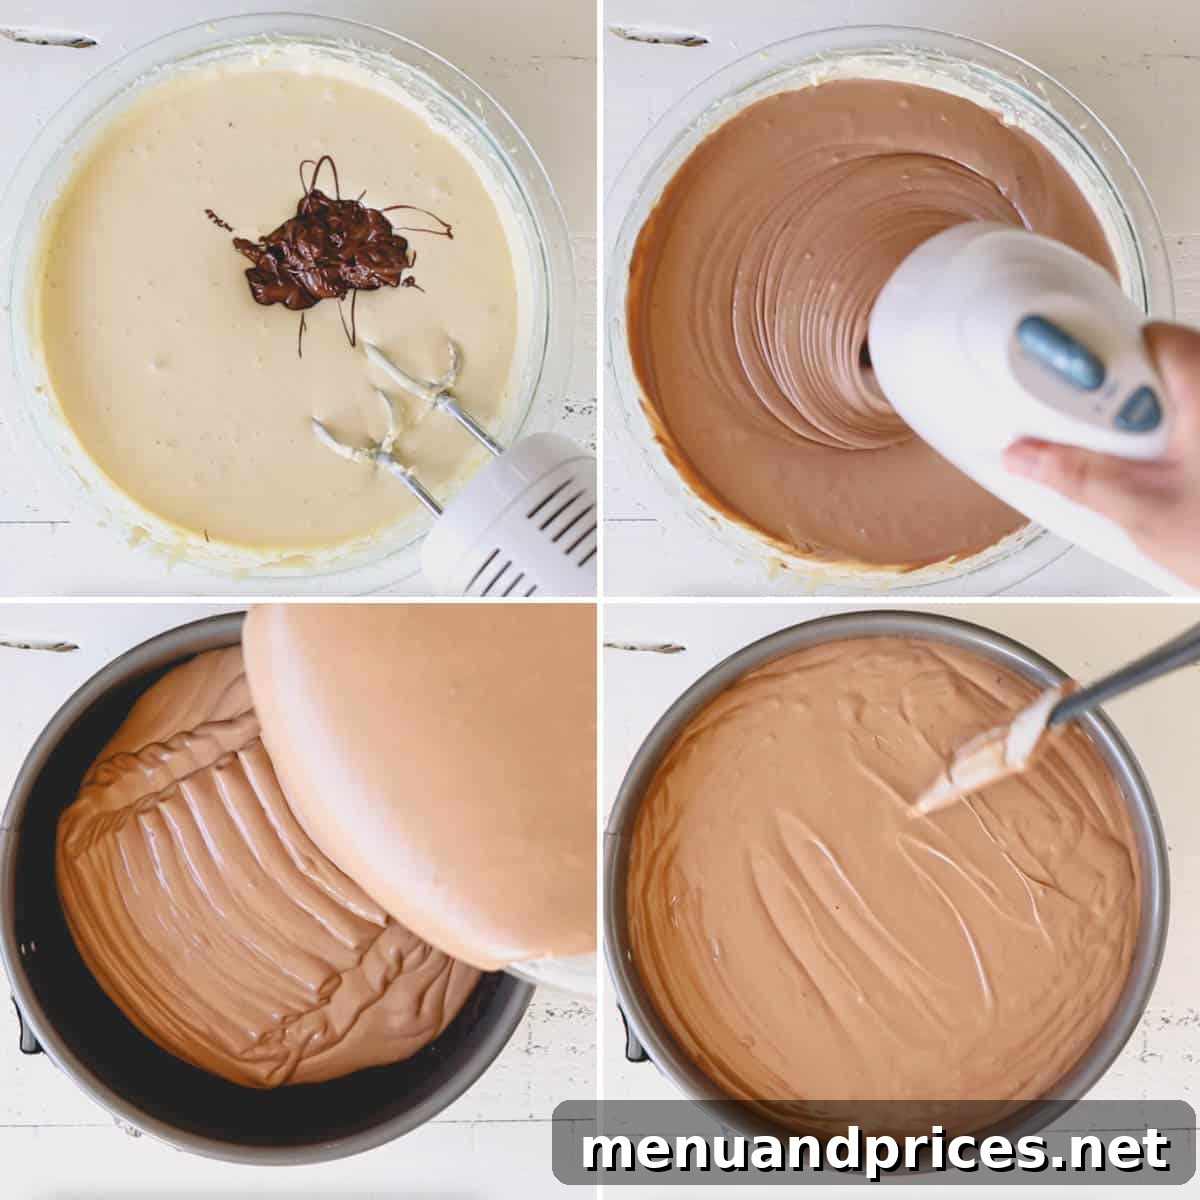
- Fold in Melted Chocolate: Finally, add the melted and slightly cooled chocolate to the cheesecake batter. Stir gently until it is fully incorporated and the batter is a uniform, rich chocolate color and smooth consistency (about 1-2 minutes). Again, avoid aggressive mixing.
- Pour and Level: Carefully pour the beautifully smooth chocolate cheesecake batter into the prepared Oreo crust. Gently tap the pan a few times on the counter to release any trapped air bubbles, then use an offset spatula or the back of a spoon to level the top of the batter, ensuring an even bake.
3. Baking for Perfection: The Water Bath Method
Baking cheesecake in a water bath (bain-marie) creates a moist, steamy environment in the oven, which helps the cheesecake cook gently and evenly, preventing cracks and ensuring a creamy texture. It’s a simple step that makes a huge difference.
- Set Up the Water Bath: Place your foil-wrapped springform pan into a larger roasting pan. Carefully pour 1 cup of hot water into the roasting pan, ensuring the water level comes about halfway up the sides of the springform pan. Alternatively, if you don’t have a large enough roasting pan, you can place another oven-safe baking pan filled with hot water on the rack below your cheesecake.
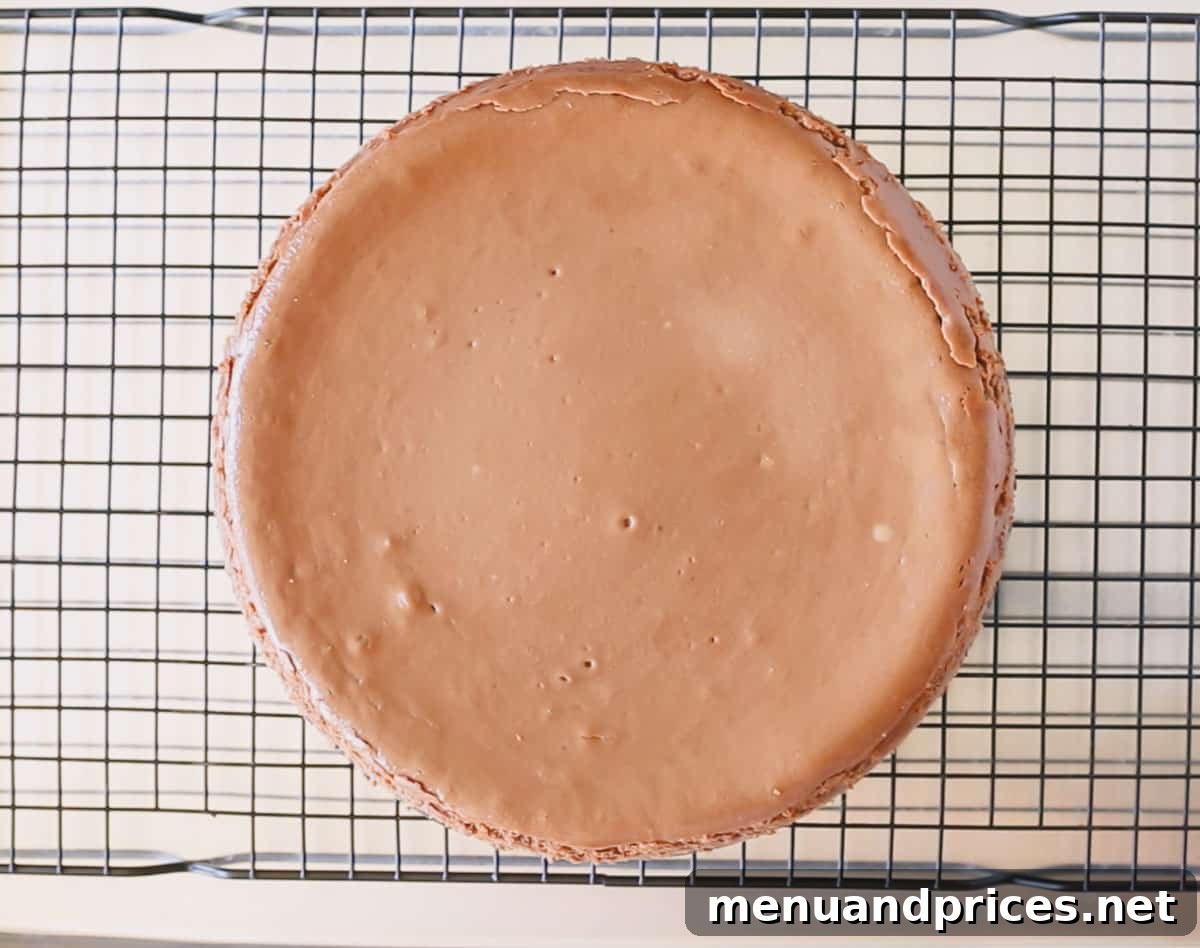
- Bake and Cool in Oven: Bake the cheesecake for approximately 55-60 minutes, or until the edges are set and slightly firm, but the center still has a slight wobble when gently shaken. This “jiggle” is a good sign that it’s perfectly cooked and will set further as it cools. Once baked, turn off the oven, open the oven door ajar (leaving it cracked), and allow the cheesecake to cool slowly inside the oven for 1 hour. This gradual cooling prevents drastic temperature changes that can cause cracks.
- Cool and Chill: After the oven cooling period, carefully transfer the cheesecake (still in its springform pan) to a wire rack. Let it cool completely to room temperature, which can take another 1-2 hours. Once at room temperature, gently run a thin knife around the edges of the pan to prevent the cheesecake from sticking as it continues to chill and contract. Then, transfer it to the refrigerator to chill for at least 2-3 hours, or ideally, overnight. Chilling is essential for the cheesecake to fully set and achieve its perfect dense, creamy texture.
4. The Grand Finale: Adding the Luxurious Chocolate Ganache
The velvety smooth ganache is the crowning glory of this chocolate cheesecake, adding an extra layer of decadence and a beautiful sheen.
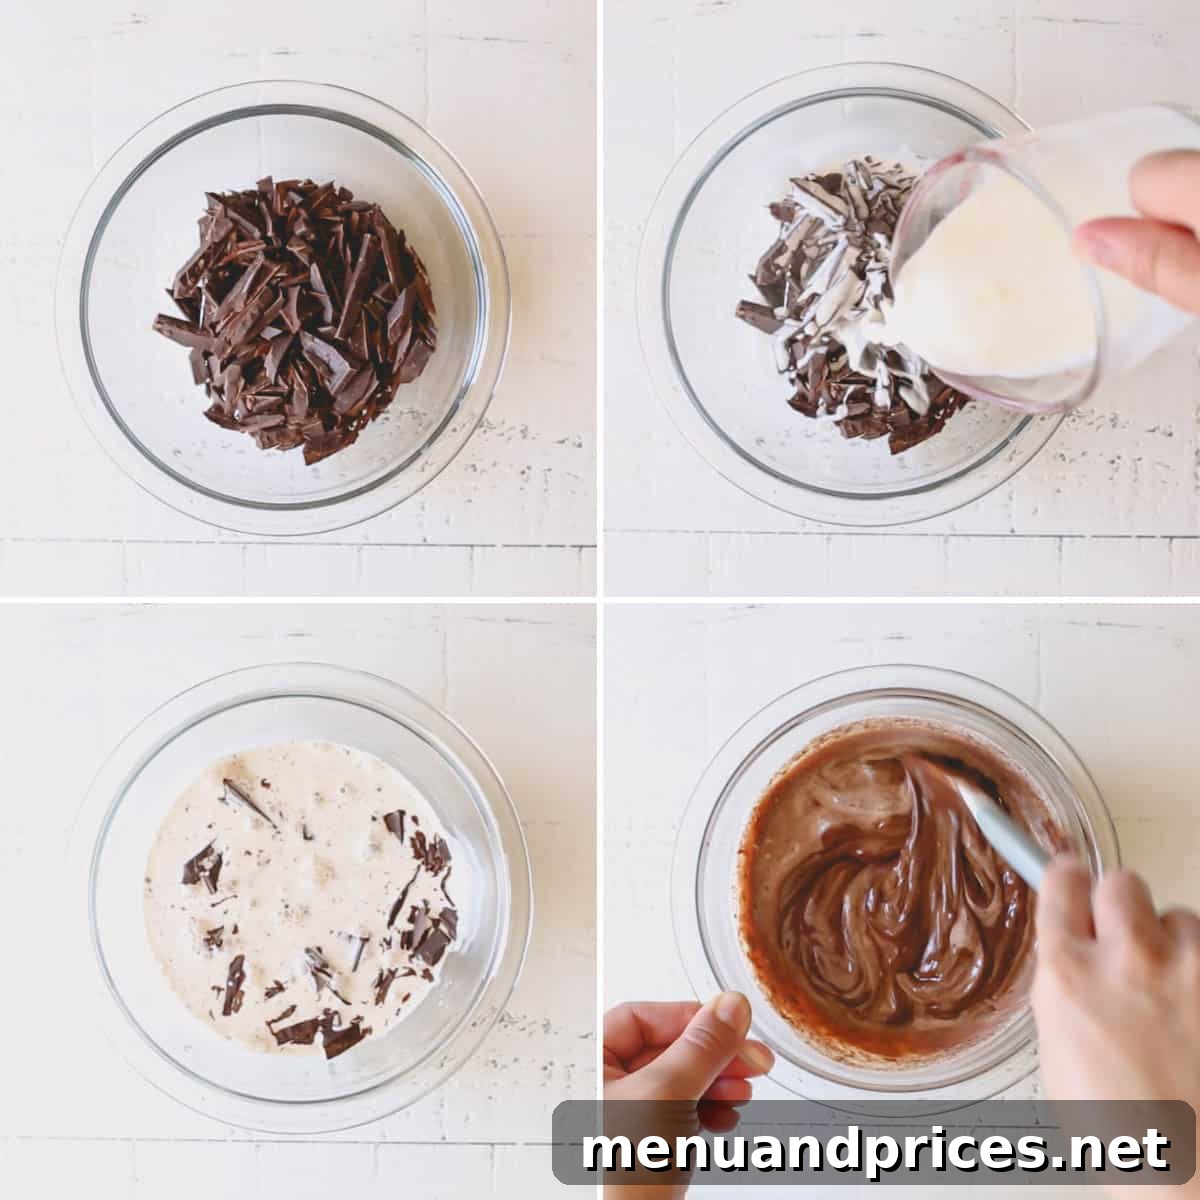
- Heat the Cream: In a microwave-safe bowl (or a small saucepan on the stovetop), heat the heavy whipping cream until it is hot and just barely simmering, but **do not let it come to a rolling boil**. Boiling cream can cause the ganache to separate or curdle.
- Combine with Chocolate: Place the finely chopped semi-sweet chocolate chips (or dark chocolate) in a heatproof bowl. Pour the hot heavy cream over the chocolate. Let it sit undisturbed for 2 minutes. This allows the heat from the cream to melt the chocolate evenly.
- Stir to Smoothness: After 2 minutes, gently stir the mixture with a whisk or spatula, starting from the center and working your way outwards, until it transforms into a completely smooth, glossy, and uniform ganache. If there are a few stubborn lumps, you can microwave it for 10-15 seconds and stir again.
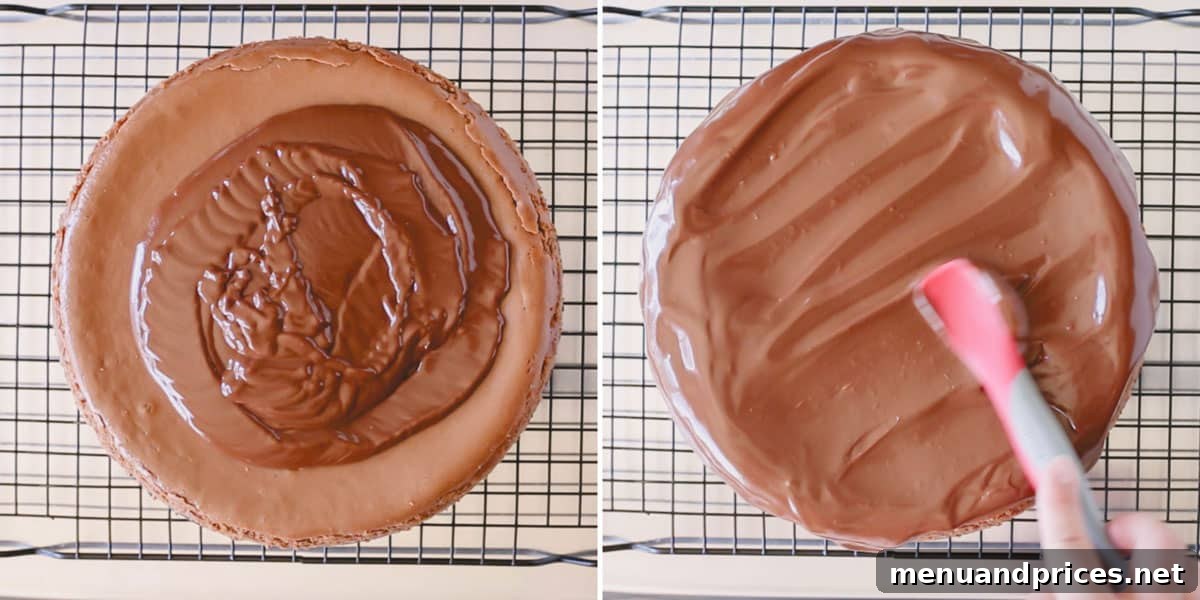
- Pour Over Cheesecake: Once your ganache is smooth and slightly cooled (it should still be pourable but not scalding hot), immediately pour it evenly over your thoroughly chilled cheesecake. Gently tilt the pan to ensure the ganache spreads to the edges, creating a beautiful, even layer.
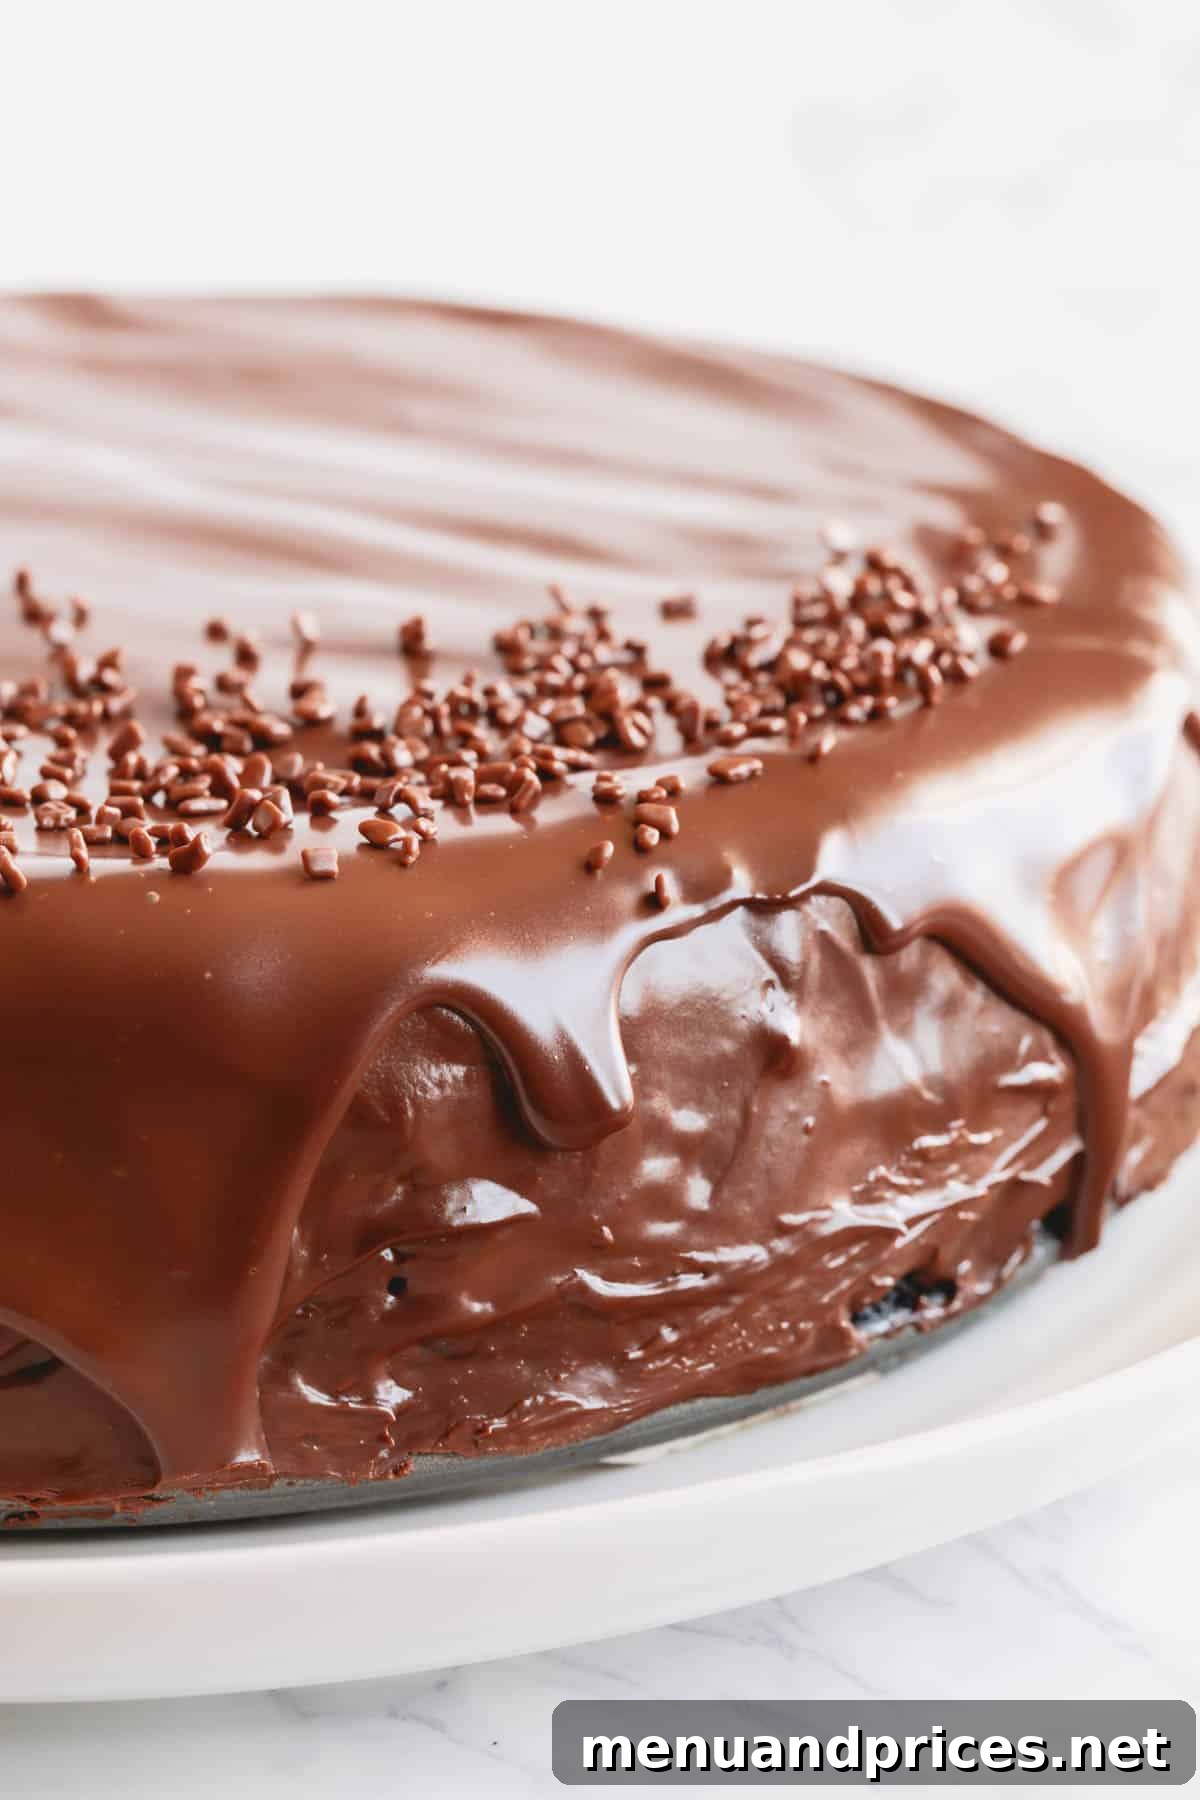
- Set and Serve: Allow the ganache to set and harden slightly at room temperature for about 30 minutes, or in the refrigerator for 15-20 minutes, before slicing and serving. This allows the ganache to firm up just enough for clean slices. Now, it’s time to enjoy your magnificent creation!
Essential Tips for a Flawless, Crack-Free Chocolate Cheesecake
Cheesecakes can sometimes be tricky, but armed with these expert tips, you’ll achieve perfection every time. These insights will help you avoid common pitfalls and ensure your chocolate cheesecake is a masterpiece.
- Handle the Batter with Care: When adding the eggs to the cream cheese mixture, **do not overbeat the batter.** Overmixing introduces too much air, causing the cheesecake to puff up excessively during baking and then dramatically collapse, leading to unsightly cracks on the surface. Beat just enough until the eggs are incorporated, then stop.
- Resist the Urge to Peek: During the baking process, **do not open the oven door.** The sudden change in temperature and humidity can cause the cheesecake to deflate, crack, or bake unevenly. Trust the process and your oven.
- Avoid Overbaking: Overbaking is a common cause of dry, cracked cheesecakes. Start checking for doneness after about 40 minutes. You’ll know your cheesecake is ready when the outer edges are set and firm to the touch, but the very center still has a slight, gentle wobble when you lightly shake the pan. This soft center will continue to set beautifully as the cheesecake cools, resulting in a perfectly creamy consistency.
- Melt Chocolate Carefully: When melting chocolate for the filling or ganache, **stir frequently**. This ensures even melting and prevents the chocolate from clumping, seizing, or burning, which can ruin its smooth texture and flavor. Low and slow is the key.
- Don’t Boil the Cream for Ganache: When preparing the chocolate ganache, heat the heavy whipping cream until it’s hot but **do not bring it to a boil**. Boiling can cause the cream to scorch or, more commonly, lead to the ganache separating and becoming oily or grainy instead of smooth and luscious.
- Room Temperature Ingredients are Non-Negotiable: As mentioned, ensure all cold ingredients like cream cheese, eggs, and sour cream are at room temperature. This is crucial for a smooth, lump-free batter and even incorporation.
- Proper Cooling is Key: The slow cooling process, first in the oven, then on a wire rack, and finally in the refrigerator, is as important as the baking itself. Rushing the cooling can lead to cracks and affect the final texture. Be patient!
Make-Ahead Mastery: Plan for Effortless Entertaining
One of the many beauties of this supreme chocolate cheesecake is its make-ahead potential. Not only does it need ample chilling time to fully set and develop its incredible flavor, but several components can also be prepared in advance, streamlining your dessert preparation and making entertaining a breeze.
- The Oreo Crust: The foundational Oreo crust can be fully prepared and baked up to 1-2 days in advance. Once baked and cooled, cover it tightly with plastic wrap and store it in the refrigerator. This gives you a head start and one less step to worry about on baking day.
- The Cheesecake Filling: While the cheesecake itself needs to bake, you can combine the chocolate cheesecake filling batter up to 1 day ahead of time. Store the prepared batter in an airtight container, covered, in the refrigerator. Just give it a gentle stir before pouring it into your pre-baked crust and proceeding with baking. This allows the flavors to meld beautifully.
Keeping Your Chocolate Cheesecake Fresh: Storage and Freezing
Ensuring your decadent chocolate cheesecake stays fresh and delicious is simple with these storage guidelines. Whether you have leftovers or want to prepare it for future enjoyment, these tips will help.
- Refrigeration: Any leftover chocolate cheesecake should be stored covered tightly with plastic wrap or in an airtight container in the refrigerator. It will maintain its optimal freshness and texture for up to 5 days.
- Freezing for Longer Enjoyment: This cheesecake freezes beautifully! For longer storage, slice the cheesecake into individual portions, or freeze it whole if you plan to serve it all at once. Wrap each slice (or the whole cheesecake) tightly in several layers of plastic wrap, then an additional layer of aluminum foil. Place it in an airtight freezer-safe container. It can be frozen for up to 2 months without significant loss of quality.
- Thawing Instructions: To enjoy frozen cheesecake, transfer it from the freezer to the refrigerator and allow it to thaw slowly overnight. This gradual thawing process helps to maintain its creamy texture and prevent ice crystals from forming. Serve chilled.
Frequently Asked Questions About Chocolate Cheesecake:
This particular chocolate cheesecake, made with the unique addition of sweetened condensed milk, delivers an exceptionally rich, deep, and complex chocolate flavor. It’s wonderfully sweet without being cloying, and its ultra-creamy, dense texture makes it feel like you’re indulging in a sophisticated chocolate truffle, but in a delightful cheesecake form!
New York cheesecake is characterized by its higher proportion of cream cheese and often includes sour cream or heavy cream, resulting in an exceptionally rich flavor and a distinctly dense, velvety consistency. Classic cheesecake, while still creamy, typically incorporates more liquid (like heavy cream or milk) into its batter, yielding a lighter, fluffier texture and a slightly less intense flavor profile compared to its New York counterpart.
The three most widely recognized and enjoyed varieties of cheesecake are New York cheesecake (known for its density), classic baked cheesecake (lighter, often with more cream), and no-bake cheesecake (a simpler version that sets in the refrigerator using gelatin or other thickeners). Each offers unique textures and flavors, and countless variations exist within these categories.
Absolutely! While semi-sweet chocolate chips are recommended for a balanced flavor, you can certainly experiment. For a richer, more intense chocolate experience, opt for good quality dark chocolate (60-70% cacao). For a milder, sweeter profile, milk chocolate could be used, but note that it might make the cheesecake significantly sweeter. Always use baking-quality chocolate for the best results.
While some cheesecake recipes can be baked without one, a water bath (bain-marie) is highly recommended for cheesecakes, especially rich ones like this. It provides a moist, even heat that prevents the cheesecake from overbaking around the edges before the center is cooked, significantly reducing the risk of cracks and ensuring a truly creamy, smooth texture throughout.
Explore More Irresistible Cheesecake Creations:
If you’ve fallen in love with making cheesecakes, be sure to explore some of our other delightful recipes:
- Pomegranate Cheesecake
- Dulce de Leche Cheesecake
- 3-Ingredient Souffle Cheesecake
- Chocolate Souffle Cheesecake
Supreme Chocolate Cheesecake
Comment
Print Recipe
Ingredients
For the Oreo Crust:
- 18 Oreo cookies (about 1.5 cups crushed)
- 4 tablespoons unsalted butter, melted
For the Chocolate Filling:
- 2 cups (340 g) semi-sweet chocolate chips
- 24 oz (680 g) cream cheese, at room temperature
- 1 (14 oz) can (400 g) sweetened condensed milk
- 3 large eggs, at room temperature
- 1/2 cup (125 g) sour cream, at room temperature
- 2 tablespoons all-purpose flour
- 1 teaspoon instant espresso powder (optional, but recommended)
- 1 teaspoon pure vanilla extract
- 1/2 teaspoon salt
For the Decadent Ganache:
- 1 cup (240 ml) heavy whipping cream
- 4 oz (115 g) semi-sweet chocolate, chopped
Instructions
Prepare the Crust:
-
Preheat your oven to 350°F (177°C). Prepare a 9-inch springform pan by wrapping it securely with two layers of heavy-duty aluminum foil to create a water-tight seal.
-
In a small food processor, pulse the Oreo cookies until they are finely ground into consistent crumbs.
-
Add the melted unsalted butter to the cookie crumbs and pulse again until the butter is thoroughly combined and all crumbs are moistened.
-
Press the cookie mixture firmly and evenly into the bottom of the prepared springform pan.
-
Bake the crust for 10 minutes to set. Remove from oven and let cool slightly while you prepare the filling.
Make the Chocolate Cheesecake Batter:
-
Melt the semi-sweet chocolate chips in a microwave-safe bowl. Heat for 1 minute at 50% power, stir well, then continue heating in 15-second intervals at 50% power, stirring after each, until the chocolate is completely smooth. Set aside to cool slightly.
-
In a large mixing bowl (using a stand mixer with a whisk attachment or an electric hand mixer), beat the room temperature cream cheese until it is light, fluffy, and perfectly smooth, with no lumps.
-
Gradually add the sweetened condensed milk to the cream cheese, beating until the mixture is smooth and well combined. Scrape down the sides of the bowl as needed.
-
Add the room temperature eggs one at a time, beating on low speed just until each egg is incorporated before adding the next. Avoid overmixing.
-
Stir in the room temperature sour cream until just combined.
-
In a separate small bowl, whisk together the all-purpose flour, instant espresso powder, pure vanilla extract, and salt. Sift this mixture into the wet ingredients and mix on low speed until just incorporated.
-
Finally, gently fold the slightly cooled melted chocolate into the cheesecake batter until it is completely smooth and uniformly colored (1-2 minutes). Do not overmix.
Bake the Cheesecake:
-
Pour the prepared chocolate cheesecake batter into the pre-baked Oreo crust, spreading it evenly.
-
Place the foil-wrapped cheesecake pan into a large roasting pan. Carefully pour 1 cup of hot water into the roasting pan, ensuring the water comes halfway up the sides of the cheesecake pan. (Alternatively, you can place another baking pan with hot water on the bottom rack below the cheesecake if your roasting pan isn’t large enough.)
-
Bake for 55-60 minutes, or until the edges are set and the center still has a slight wobble. Turn off the oven, open the door ajar, and let the cheesecake cool inside the oven for 1 hour.
-
Remove the cheesecake from the oven and roasting pan. Transfer it to a wire rack to cool for 10 minutes. Then, carefully run a thin knife around the edge of the pan. Continue cooling to room temperature (about 1-2 hours), then refrigerate for at least 2-3 hours, or preferably overnight, until thoroughly chilled and set.
Make the Ganache Topping:
-
Heat the heavy whipping cream in a microwave-safe bowl (or on the stovetop) until it’s hot and simmering, but do not let it boil.
-
Pour the hot cream over the chopped semi-sweet chocolate in a separate bowl. Let it sit undisturbed for 2 minutes to allow the chocolate to melt. Then, gently stir until the ganache is completely smooth and glossy.
-
Immediately pour the warm, smooth ganache evenly over the thoroughly chilled cheesecake. Gently spread to the edges if needed. Allow the ganache to set at room temperature or in the fridge before serving. Enjoy your supreme chocolate cheesecake!
⭐️ Did you make this recipe?
Please leave a review and let us know how you liked it!
Chef’s Notes & Pro Tips
Note 2 (Cream Cheese): For the best results, always use full-fat, plain, block-style cream cheese. Ensure it’s brought to room temperature 1-2 hours before you start mixing to guarantee a smooth, lump-free batter.
Storing & Freezing Tips:
– **Refrigerate:** Store leftover chocolate cheesecake covered tightly in the fridge for up to 5 days.
– **Freeze:** For longer enjoyment, freeze individual slices or the whole cheesecake (well-wrapped) in an airtight container for up to 2 months.
– **Thaw:** Always thaw frozen cheesecake slowly overnight in the refrigerator before serving to maintain its creamy texture.
Nutrition Information (per serving)
This recipe was originally published on September 14, 2017.