
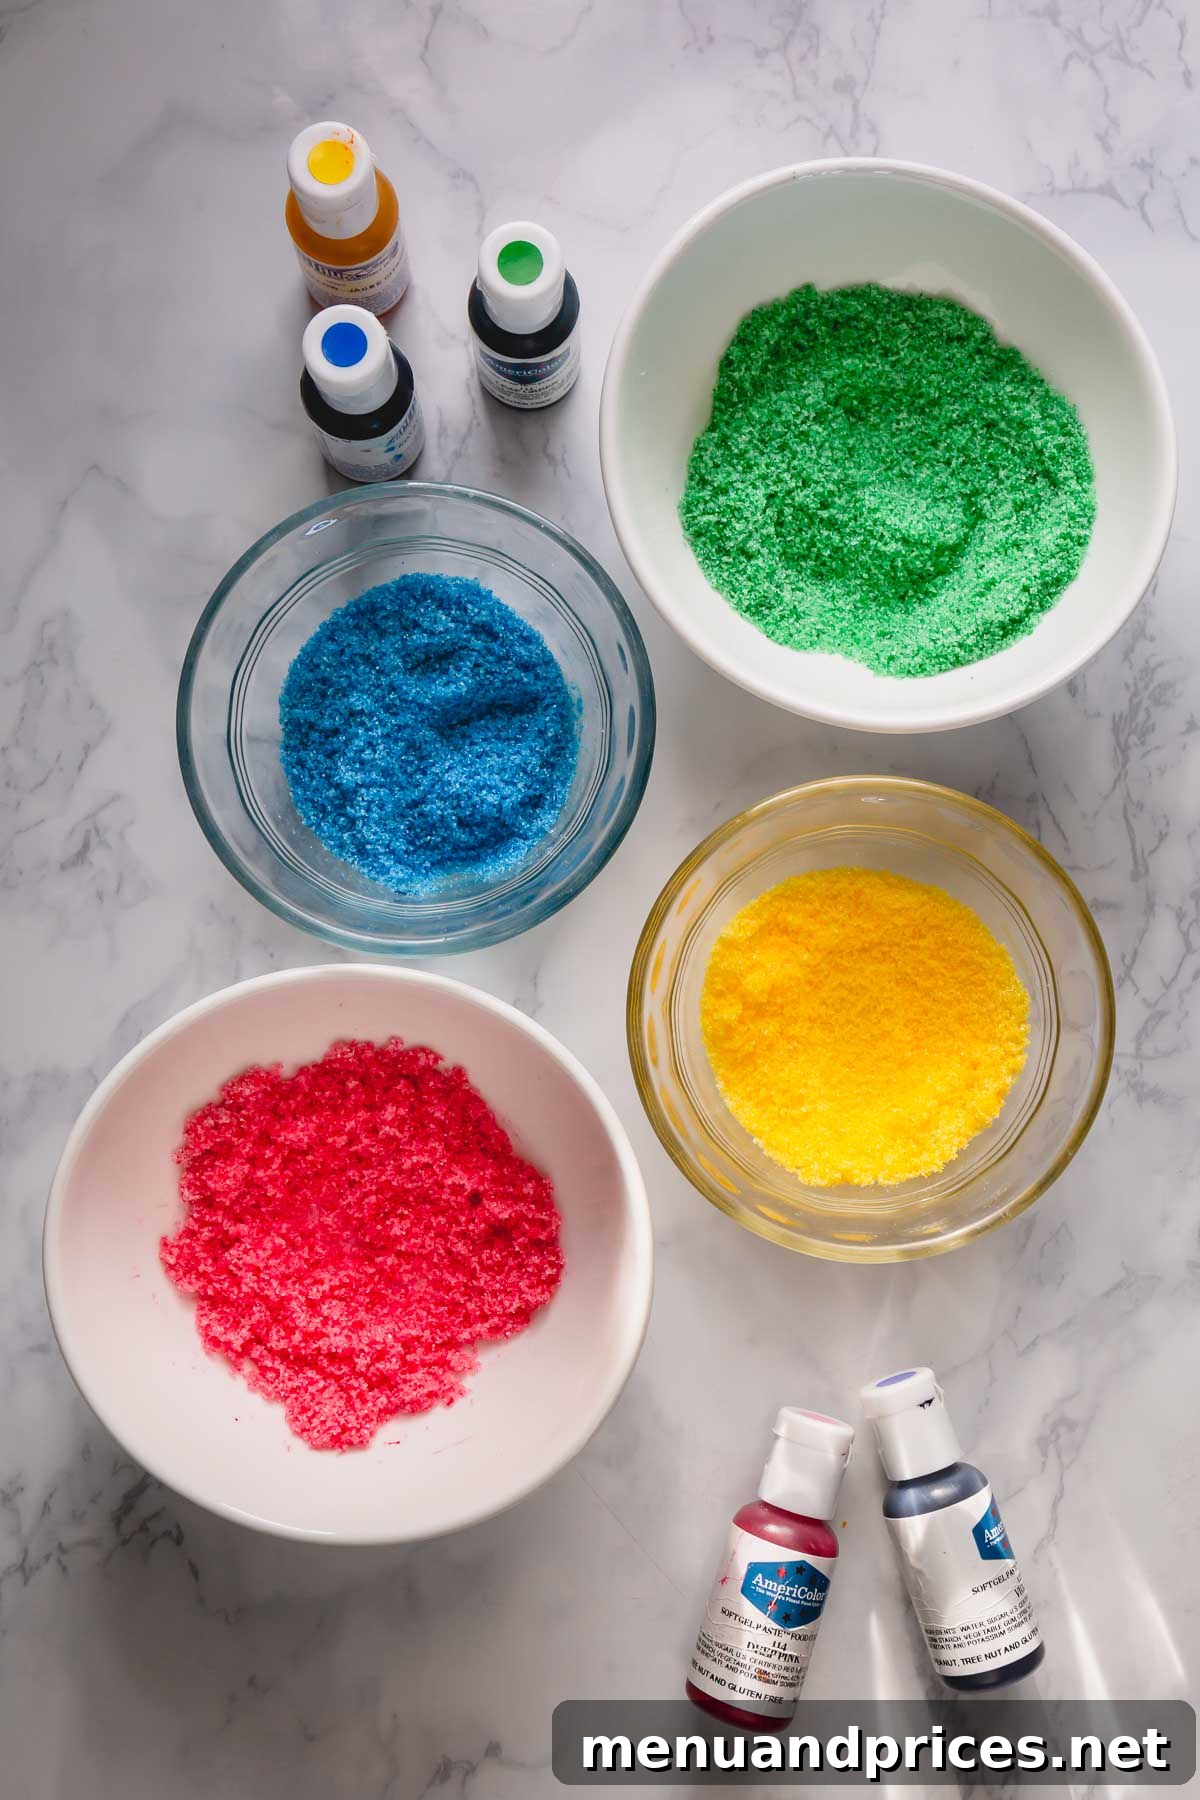
Sparkle Up Your Baking: The Ultimate Guide to Homemade DIY Colored Sugar
DIY colored sugar is a simple, fun, and incredibly versatile way to add a touch of festive sparkle and vibrant personality to your baked goods. Whether you’re decorating holiday cookies, enhancing cupcakes, or rimming a celebratory drink, homemade colored sugar offers an endless palette of possibilities. All you need are two basic ingredients – granulated sugar and food coloring – and you’re ready to transform ordinary treats into extraordinary delights!
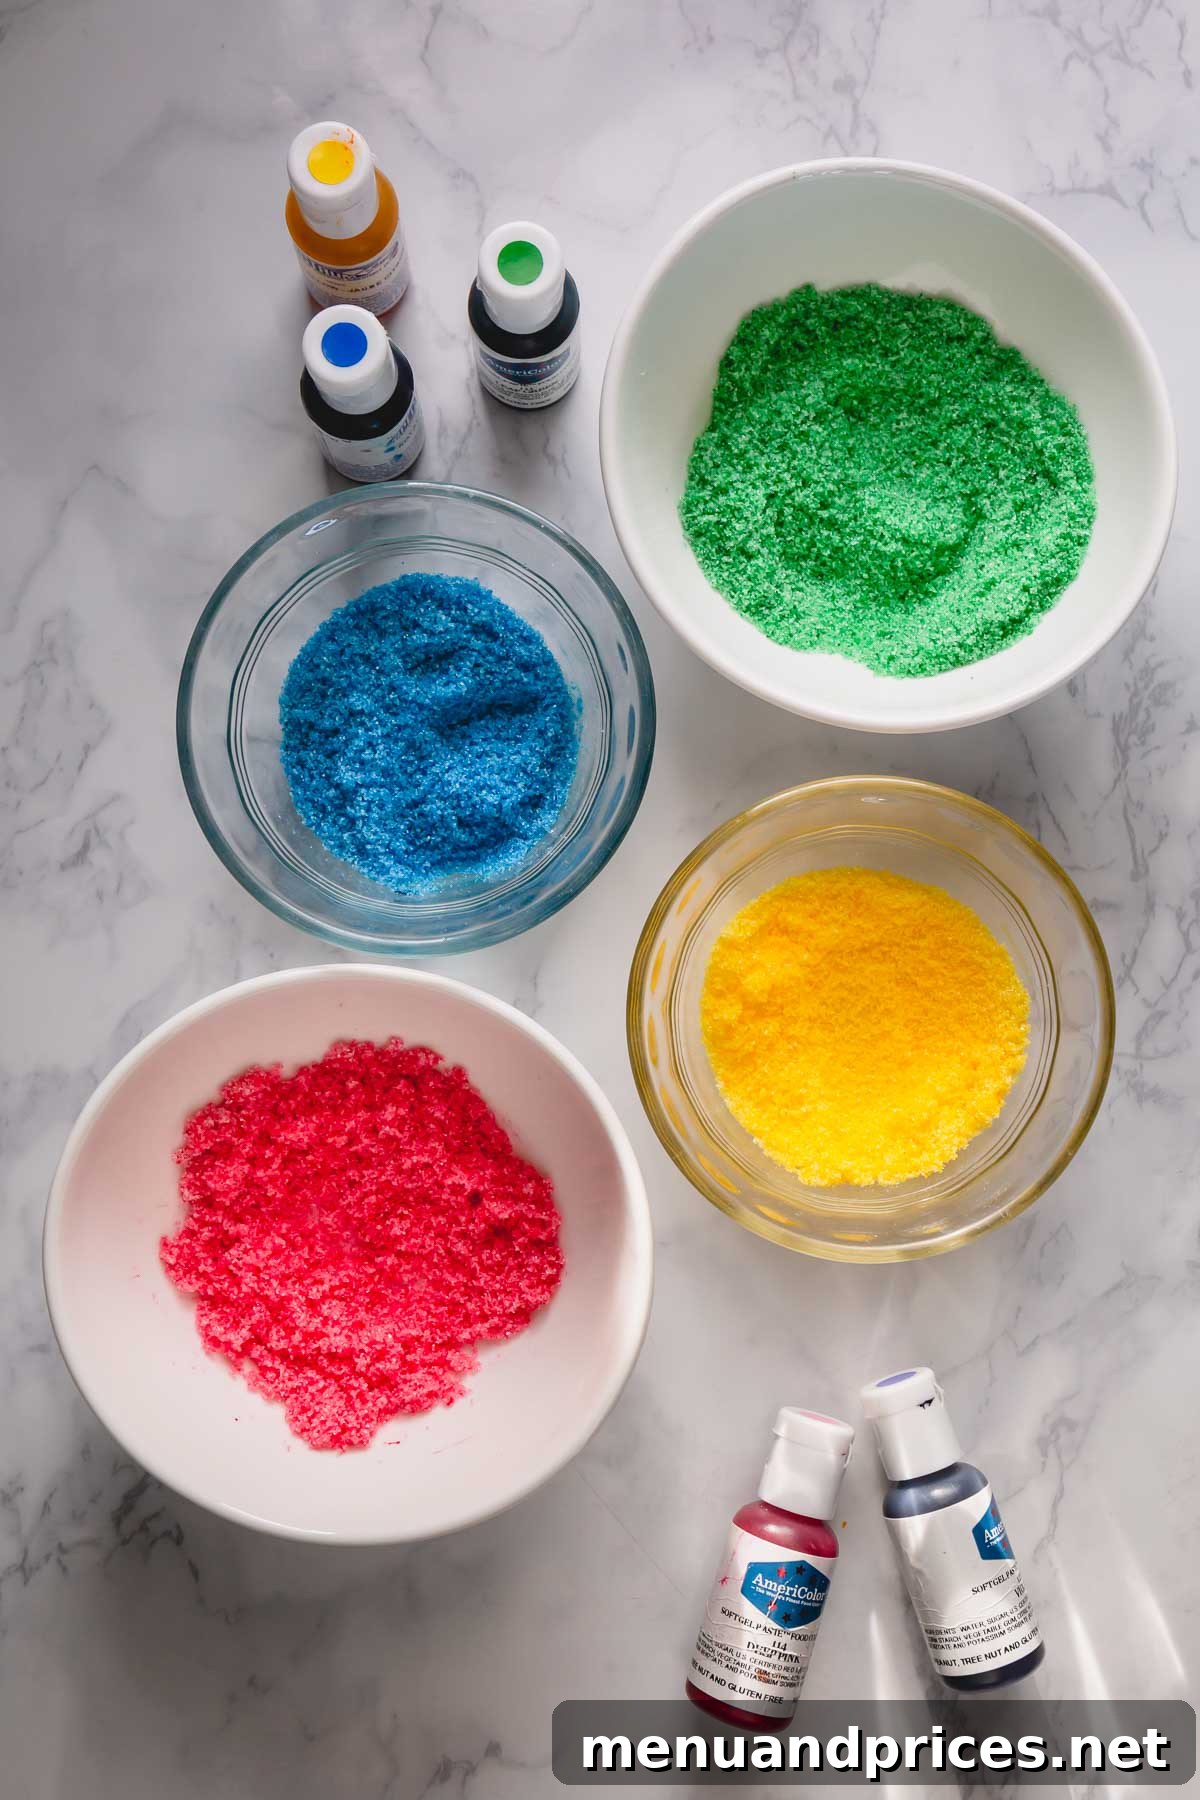
Why You’ll Adore Making Your Own Colored Sugar
There’s a special kind of magic that comes with homemade creations, and colored sugar is no exception. It’s a fantastic activity to share with family, especially during holiday baking seasons, providing a creative outlet for both adults and children. Beyond the sheer enjoyment, there are several compelling reasons to ditch the store-bought sprinkles and embrace the DIY approach.
Cost-Effectiveness That Can’t Be Beat
Pre-made colored sugars and sprinkles can be surprisingly expensive, especially if you need multiple colors or large quantities for ambitious baking projects. Making your own is incredibly budget-friendly, utilizing common pantry staples. A single bag of granulated sugar and a few tubes of gel food coloring will yield copious amounts of customized sprinkles, significantly cutting down on costs and allowing for more baking adventures without breaking the bank.
Unleash Your Creativity with Custom Colors
One of the biggest advantages of DIY colored sugar is the unparalleled freedom to create any color imaginable. Tired of the limited selection at the grocery store? With homemade sugar, your artistic vision is the only limit. You can:
- Match specific party themes, school colors, or corporate branding.
- Create unique ombre effects by carefully blending different shades.
- Develop custom blends for every holiday – think delicate pastels for Easter, vibrant red and green for Christmas, spooky orange and black for Halloween, or even patriotic red, white, and blue for national celebrations.
- Experiment with subtle, muted hues or bold, electrifying tones that perfectly complement your frosting or cookie designs.
This level of customization is simply not possible with off-the-shelf options, making your desserts truly unique and personalized masterpieces.
A Fun and Engaging Activity for All Ages
Involving kids in the kitchen is a wonderful way to teach them about cooking, foster creativity, and make lasting memories. Making colored sugar is a particularly child-friendly activity, requiring minimal supervision and offering instant gratification as the colors transform. It’s a captivating sensory experience – seeing the colors blend, feeling the sugar crystals, and anticipating the sparkling results. This hands-on process can easily become a cherished family tradition, especially during festive periods, creating joy and connection through shared culinary endeavors.
Enjoy Freshness and Control Over Ingredients
When you make your own colored sugar, you have complete transparency regarding what goes into it. This means no unpronounceable additives, artificial flavors, or unnecessary preservatives often found in commercial sprinkles. You have full control over the quality and type of ingredients, ensuring a fresh, pure, and often more wholesome product that’s perfect for your edible creations. It’s a simple, yet significant, enhancement to your home baking toolkit.
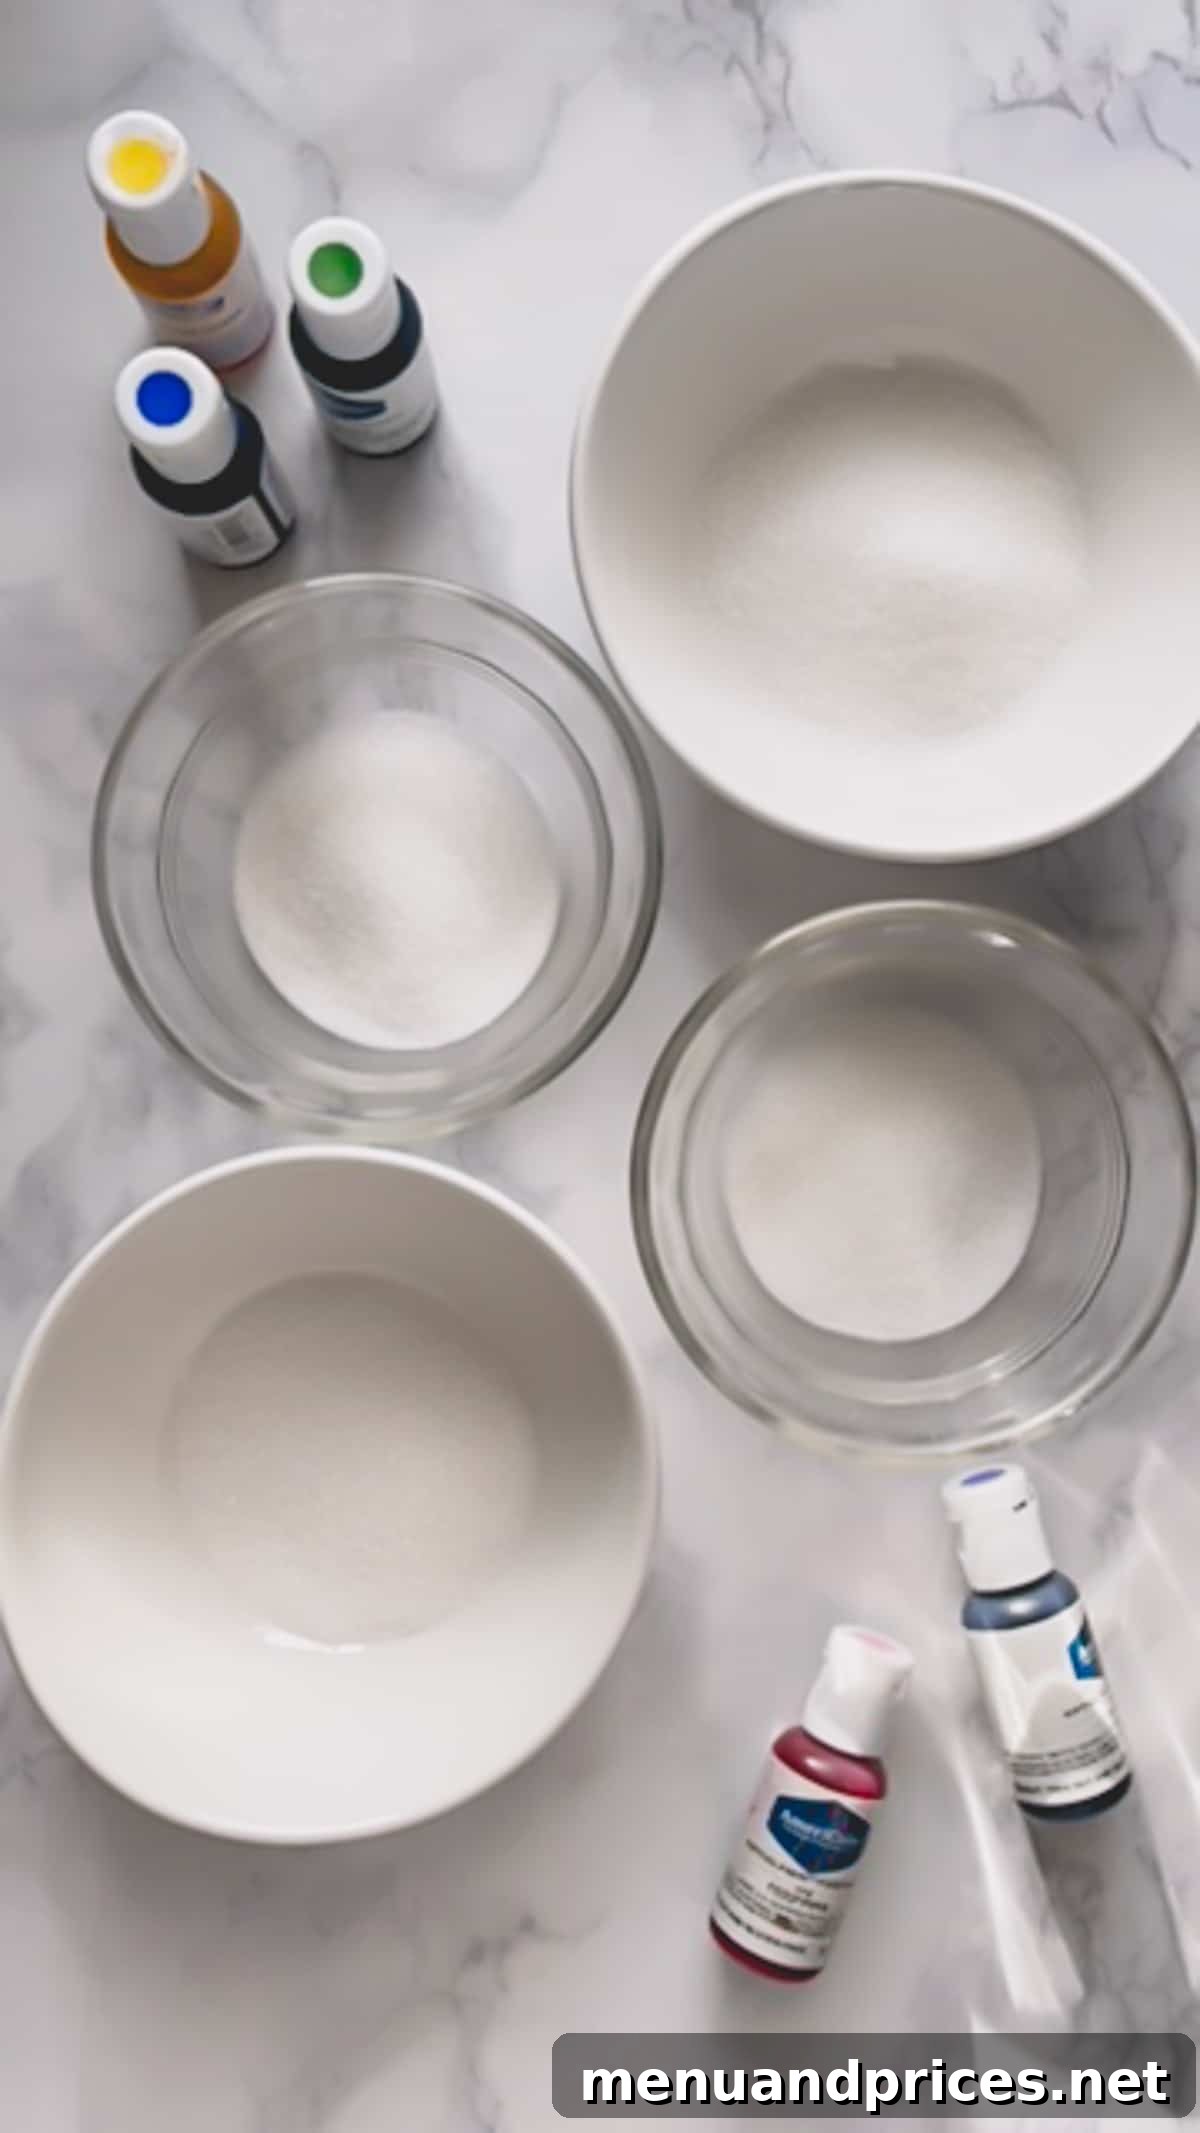
Essential Ingredients for Your Vibrant Creations
The inherent beauty of DIY colored sugar lies in its incredible simplicity. You truly only need two core ingredients, making it an accessible and inexpensive project for any home baker, regardless of skill level.
The Foundation: Granulated Sugar
Standard granulated sugar, commonly known as white sugar or table sugar, serves as your primary ingredient. Its fine crystal structure and neutral flavor make it an ideal canvas for absorbing food coloring and providing that quintessential sparkle and delightful crunch. While other sugars like superfine (caster) sugar for a finer texture or coarse decorator’s sugar (sanding sugar) for a bolder sparkle can also be colored, granulated sugar is the most common, cost-effective, and readily available choice. It consistently delivers excellent results for general-purpose decorating and is the recommended starting point for beginners.
The Magic of Gel Food Coloring
When it comes to imparting color to your sugar, gel food coloring is undeniably the superior choice. Here’s why it’s highly recommended over traditional liquid food coloring:
- Vibrant and Concentrated Pigments: Gel food colorings contain highly concentrated pigments, meaning you need only a tiny drop to achieve deep, rich, and remarkably vibrant colors. A little truly goes a long way, ensuring your sugar sprinkles pop with brilliant hues.
- Minimal Moisture Content: Unlike liquid food coloring, which is predominantly water-based, gel food coloring introduces very little moisture to the sugar. This is a critical factor because excess moisture can dissolve the delicate sugar crystals, leading to clumpy, sticky sugar that’s difficult to work with, or even turning it into an unusable paste. Gel colors ensure your sugar remains crystalline, free-flowing, and perfectly textured.
- Brighter, More Intense Hues: The concentrated nature of gel colors results in much brighter and more vivid hues compared to the often-muted or pastel shades achieved with liquid dyes. If you’re aiming for show-stopping color, gel is the way to go.
You can readily find gel food coloring at most craft stores, baking supply shops, and often in the baking aisle of larger supermarkets. A starter pack with primary colors (red, blue, yellow) will provide you with the ability to mix and match, allowing you to create almost any shade imaginable.
Your Step-by-Step Guide to Crafting Beautiful Colored Sugar
Making your own colored sugar is an incredibly simple and straightforward process, requiring no special tools, complex ingredients, or advanced culinary skills. Follow these easy steps to create your own custom, sparkling sprinkles:
Step 1: Prepare Your Workspace and Gather Supplies
Before you begin, ensure you have all your necessary items laid out and ready. You’ll need granulated sugar, your desired gel food coloring(s), a small bowl for each color you plan to make, and a spoon or fork for thorough mixing. For easier cleanup and to protect your surfaces, you might also want to line your workspace with parchment paper, wax paper, or a silicone mat.
Step 2: Add Food Coloring to Sugar
- Start by pouring the desired amount of granulated sugar into a clean, dry bowl. For a single batch, anywhere from ¼ to ½ cup is usually sufficient. Remember, you can always make more!
- Carefully add a tiny drop or two of gel food coloring to the sugar. It’s crucial to remember that gel colors are highly concentrated, so it’s always better to start with less and add more incrementally if needed. You can easily intensify the color, but it’s nearly impossible to lighten it once the dye has been incorporated.
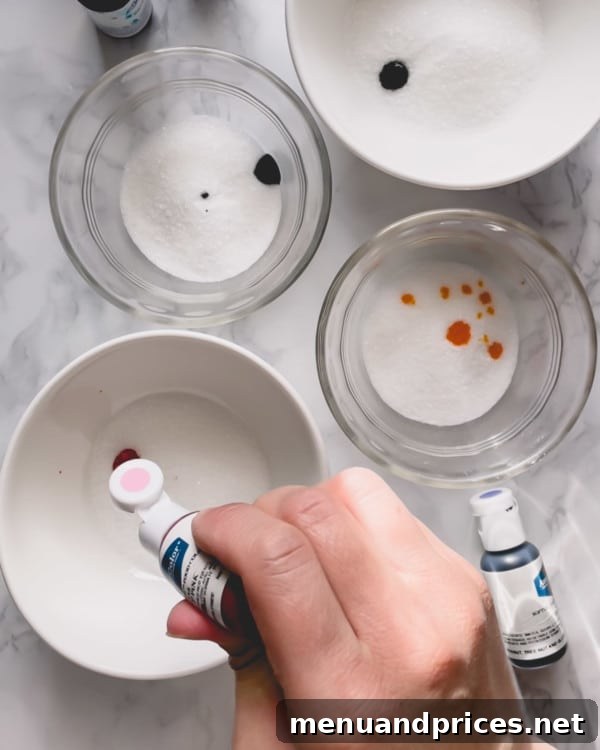
Step 3: Blend the Color Thoroughly
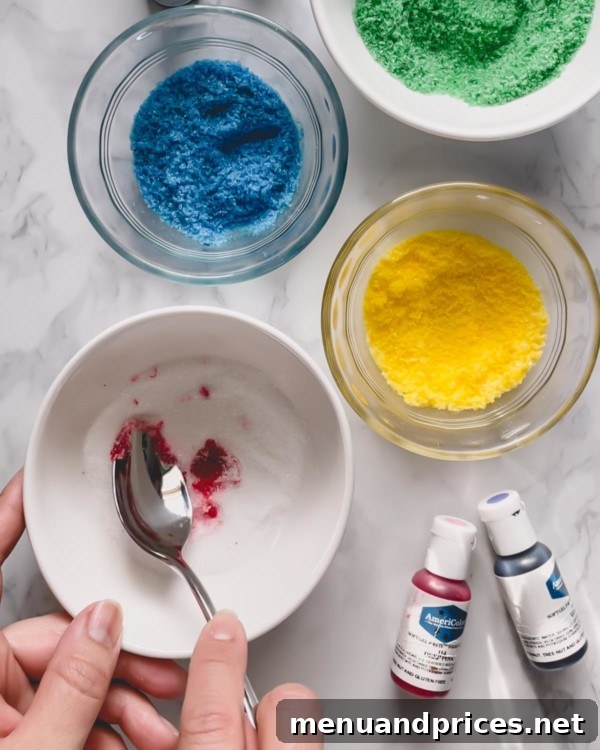
Using the back of a spoon, a fork, or even your clean fingers (wearing gloves is recommended to prevent staining), thoroughly blend the food coloring into the sugar. Continue mixing and stirring until the color is evenly distributed throughout all the sugar crystals. It’s important to ensure there are no white patches or streaks left. If you find the color isn’t as vibrant or deep as you’d like, add another tiny drop of gel coloring and continue mixing until you achieve your desired hue. For larger batches, a sturdy zip-top bag can be an excellent tool – simply add the sugar and coloring, seal the bag tightly, and then rub and massage the sugar until the color is uniform and consistent.
Step 4: Allow the Colored Sugar to Air Dry
After thoroughly mixing, it’s an essential step to let your colored sugar dry completely. This crucial phase ensures that any minuscule amount of moisture from the food coloring evaporates, which is vital for preventing clumping and allowing the sugar to remain perfectly free-flowing and sparkly.
- Spread the colored sugar in a thin, even layer on a baking sheet lined with parchment paper or wax paper. This maximizes surface area for drying.
- Let the sugar air dry at room temperature for approximately 30-60 minutes. In more humid environments, or if you happened to use a bit more coloring, it might take a little longer. You can gently stir or rake the sugar occasionally with a fork to help with faster and more even drying.
- Once completely dry, the sugar should be loose and crumbly, without any sticky bits or clumps. If it’s still slightly sticky, continue drying.
That’s it! In just a few incredibly simple steps, you’ve created beautiful, custom-colored sugar that’s ready to add sparkle to your treats. It’s a no-fuss, quick, and remarkably easy process that consistently yields impressive results every time.
Storing Your Homemade Colored Sugar for Longevity
Proper storage is paramount to keeping your homemade colored sugar fresh, perfectly free-flowing, and vibrantly colored for all your future baking projects. The excellent news is that sugar itself acts as a natural preservative, so if stored correctly, your colored sugar can last for an extended period – often indefinitely.
The Best Way to Store: Airtight Containers
Once your colored sugar is completely dry and cooled (if applicable), immediately transfer it into airtight containers. Small glass jars with tight-fitting lids, plastic food storage containers, or even heavy-duty zip-top freezer bags are all excellent choices. The primary goal is to protect the sugar from any exposure to moisture and air, both of which can cause it to clump, harden, or potentially lose its vibrant color over time.
Location Matters: Cool and Dry Environment
Store the sealed containers in a cool, dry place away from direct sunlight, heat sources, and humidity. A pantry, a kitchen cupboard, or even a drawer that is not directly exposed to heat is ideal. Avoid storing your colored sugar near appliances that generate heat or steam, such as ovens, dishwashers, or stovetops, as temperature fluctuations and moisture can introduce condensation, which is the ultimate enemy of perfectly free-flowing sugar.
Additional Tips for Optimal Storage:
- Remove Excess Air: If you are using zip-top bags for storage, make sure to squeeze out as much air as possible before securely sealing them.
- Label Your Creations: Especially if you plan to make many different colors, labeling your containers with the color and the date of creation will help you stay organized and easily identify your custom hues.
- Prevent Clumping: Should you find that your sugar has clumped slightly after extended storage, there’s no need to worry! You can easily remedy this by gently pressing and breaking up the clumps with the back of a spoon or a fork. For larger quantities, a brief pulse in a food processor can also help restore its free-flowing texture (just be careful not to pulverize it into powdered sugar).
Recipe Summary: DIY Colored Sugar
This recipe provides a quick and easy way to make vibrant, festive colored sugar at home for all your decorating needs.
- Author: Shinee Davaakhuu
- Prep Time: 5 minutes
- Total Time: 5 minutes (plus 30-60 minutes drying time)
- Yields: Approximately 0.25 cup (per batch)
- Course: Garnish, Decoration, Topping
- Cuisine: American
Ingredients
- 1/4 cup granulated sugar
- A few drops of gel food coloring (adjust as needed for desired intensity)
Instructions
- Place the granulated sugar in a small, clean, and dry bowl.
- Add 1-2 tiny drops of your chosen gel food coloring to the sugar. Remember to start with a small amount, as gel colors are highly concentrated.
- Using the back of a spoon or a fork, thoroughly blend the food coloring into the sugar. Continue mixing until the color is evenly distributed throughout all the sugar crystals and no white streaks remain. Add more gel coloring sparingly if a deeper or more vibrant shade is desired.
- Spread the colored sugar in a thin, even layer on a baking sheet that has been lined with parchment paper or wax paper.
- Allow the sugar to air dry at room temperature for 30-60 minutes, or until it is completely dry and free-flowing. Gently stir occasionally to aid drying.
- Once fully dry, transfer the colored sugar to an airtight container or a zip-top bag. Store it in a cool, dry place away from moisture and heat.
Nutrition Information (per 1/4 cup serving)
- Calories: 774 kcal
- Carbohydrates: 200g
- Sugar: 200g
- Sodium: 2mg
⭐️ Did you make this recipe? We’d love to hear from you! Please consider leaving a review and letting us know how you liked it.
Creative Uses for Your Homemade Colored Sugar
Once you’ve mastered the incredibly simple art of making colored sugar, a vibrant world of decorative possibilities opens up right in your kitchen. This versatile ingredient isn’t just for cookies anymore! Here are some inspiring ideas to put your beautiful, homemade colored sugar to delightful use across various culinary creations:
Elevate Your Baked Goods and Confections
- Cookies: This is arguably the most classic application! Roll cookie dough in colored sugar before baking for a wonderfully sparkling finish, creating cookies that shimmer from the oven. Alternatively, sprinkle it generously over freshly frosted cookies, sugar cookies, or shortbread for an instant festive touch and added texture.
- Cupcakes & Cakes: Give your cupcakes and cakes a professional and playful touch by sprinkling your custom colored sugar over freshly applied frosting or glazes. You can create intricate patterns, cover the entire surface for a dazzling effect, or even use different colors to denote various flavors.
- Muffins & Scones: A light dusting of colored sugar on top of your muffin or scone batter before baking can add a lovely subtle crunch, a hint of extra sweetness, and an appealing visual element to your breakfast pastries.
- Donuts: After glazing or frosting, roll or sprinkle your homemade colored sugar onto donuts for a fun, carnival-like appearance that’s perfect for celebrations.
Sparkle Up Your Beverages
- Cocktail & Mocktail Rims: Transform ordinary drinks into extraordinary concoctions! Simply wet the rim of a glass with water, lemon juice, lime juice, or simple syrup, then dip it into your colorful sugar for a stunning and edible garnish. This is perfect for themed parties, holiday gatherings, or any celebratory beverage.
- Hot Chocolates & Lattes: A festive sprinkle of colored sugar on top of whipped cream or foamed milk can elevate a simple hot chocolate or latte into a special, Instagram-worthy treat.
Enhance Everyday Treats and Desserts
- Yogurt & Fruit Parfaits: Add a fun crunch and a vibrant pop of color to plain yogurt, fruit salads, or layered parfaits.
- Pancakes & Waffles: Sprinkle your colored sugar over warm pancakes or waffles alongside syrup for a playful and extra-special breakfast, particularly appealing to children.
- Ice Cream & Sundaes: Use your custom sugars as a vibrant and crunchy topping for ice cream, sundaes, milkshakes, or even fruit crumbles.
- Edible Decorations & Crafts: Beyond direct consumption, colored sugar can be used for edible art on gingerbread houses, to decorate candy apples, or as an element in a creative dessert charcuterie board. It can even be used for kid-friendly craft projects where edible glitter is desired.
Tips for Achieving Perfect Colored Sugar Every Time
While the process of making colored sugar is remarkably straightforward, a few expert tips and tricks can ensure your creations are always vibrant, perfectly clump-free, and exactly what you envisioned for your baking projects:
- Start with Less Color, Add Gradually: This is perhaps the most crucial tip. It is always significantly easier to add more food coloring to deepen a shade than it is to try and lighten an overly saturated color. Begin with just a tiny drop of gel food coloring, mix thoroughly, and then gradually add more, one drop at a time, until you reach your desired shade and intensity. Patience is key!
- Utilize Separate Utensils for Each Color: If you plan on making multiple colors in one session, always use a different spoon or fork for each individual color. This simple practice prevents accidental color mixing and ensures that each batch retains its pure, intended hue.
- Protect Your Work Surfaces: Gel food coloring, especially in its concentrated form, can be quite potent and may stain countertops, cutting boards, or clothing. Always work on a surface that is covered with parchment paper, wax paper, a silicone mat, or even newspaper. Consider wearing disposable gloves to protect your hands, particularly if you have sensitive skin or are working with very strong, dark colors.
- Break Up Any Clumps Promptly: If you notice any small clumps starting to form during the mixing process or while the sugar is drying, gently but firmly break them up with a fork or the back of a spoon. Addressing clumps early ensures that your final product is uniform, free-flowing, and visually appealing.
- Consider Finer Sugar for Specific Applications: While standard granulated sugar is excellent for most uses, if you desire an extra-fine, almost dust-like shimmer, you could lightly pulse the finished, completely dry colored sugar in a food processor for just a few seconds. Be extremely careful not to over-process, or you’ll inadvertently turn it into powdered sugar! Alternatively, you can start with superfine (caster) sugar for a naturally finer texture.
Troubleshooting Common DIY Colored Sugar Issues
Even though making colored sugar is simple, like any kitchen project, you might encounter a minor hiccup or two. Don’t fret! Most common problems are easily resolved. Here’s how to troubleshoot and ensure your colored sugar turns out perfectly every time:
My Sugar is Too Wet or Clumpy!
This is the most common issue and usually occurs if too much liquid (either from excessive food coloring or high ambient humidity) was introduced, or if the drying time was insufficient.
- Solution: The best approach is to spread the sugar out even more thinly on a clean baking sheet lined with parchment paper. Allow it to air dry for an extended period, which could range from a few extra hours to even overnight, depending on the humidity in your environment. Gently stir or fluff the sugar occasionally to expose all sides of the crystals to the air, promoting more efficient drying. If it’s quite clumpy, use a fork to carefully break up larger pieces once it’s mostly dry.
The Color Isn’t Vibrant Enough.
This simply indicates that you need more pigment to achieve your desired intensity. Gel food colorings are potent, but sometimes a few more drops are needed for deep hues.
- Solution: Add another tiny drop or two of gel food coloring to the sugar and mix it thoroughly once again. Continue this process, adding drops sparingly and mixing well after each addition, until you achieve the desired depth and vibrancy. Remember to be patient and add gradually to avoid over-coloring.
The Sugar is Still Pale or Streaky After Mixing.
Uneven mixing is typically the culprit here, meaning the food coloring hasn’t been uniformly distributed among all the sugar crystals.
- Solution: Continue mixing the sugar and food coloring with diligent effort until all crystals are uniformly coated. Use the back of a spoon to press and rub the sugar against the bowl’s surface to help break up any concentrated areas of dye and ensure every granule is incorporated. For larger batches, the zip-top bag method (massaging the sugar within the sealed bag) can be highly effective for achieving consistently even color distribution.
Frequently Asked Questions About Homemade Colored Sugar
Here are answers to some common questions that arise when making your own colored sugar, to help you become a colored sugar expert:
Can I use liquid food coloring instead of gel?
While it is technically possible, it is generally not recommended for optimal results. Liquid food coloring contains a significantly higher water content, which can easily dissolve the delicate sugar crystals. This leads to sticky, clumpy, and difficult-to-dry sugar that won’t have the desired free-flowing texture or vibrant color. If you absolutely must use liquid coloring, use very, very small amounts and prepare for a much longer drying time. Gel food coloring is vastly superior for its concentrated color and minimal moisture introduction.
How long does homemade colored sugar last?
When stored properly in an airtight container in a cool, dry place, homemade colored sugar can last for an incredibly long time – often almost indefinitely. Sugar itself is a natural preservative, inhibiting bacterial growth. Its quality won’t degrade in terms of safety, though extremely old sugar might slightly lose some of its initial vibrant color over many, many years if frequently exposed to light.
Can I make different textures of colored sugar?
Yes, you can! For a finer sugar texture, you can either start with superfine (caster) sugar or gently pulse your finished, completely dry colored granulated sugar in a food processor for just a few short seconds. Be extremely careful not to over-process, or you will quickly end up with powdered sugar instead of crystalline sugar. For a coarser, more sparkling sugar, you could experiment with turbinado sugar, but be aware that its larger crystal size and natural brownish tint may affect color absorption and final appearance.
Is homemade colored sugar safe for kids to eat?
Absolutely! As long as you use standard food-grade granulated sugar and non-toxic, food-safe gel food coloring (which are designed for consumption), your homemade colored sugar is perfectly safe for children to eat and to handle during baking activities. It’s a wonderful way to involve them in creating edible decorations.
Can I make large batches of colored sugar?
Yes, you can easily scale up this recipe to make larger quantities! For bigger batches, consider using a larger mixing bowl or a robust, gallon-sized zip-top bag for the mixing process. You will also likely need multiple baking sheets for the drying phase to ensure that the sugar is spread in a thin enough layer for efficient and even drying. Avoid piling the sugar too high, as this will significantly extend the drying time.
Ready to Add a Pop of Color?
Making your own colored sugar is a truly delightful and rewarding kitchen project that unlocks endless creative possibilities for all your baking and decorating needs. It’s incredibly simple, wonderfully budget-friendly, and offers complete customization of colors to perfectly suit any occasion, theme, or mood you desire. From sparkling holiday cookies that become instant showstoppers, to dazzling birthday cupcakes that bring smiles, and vibrant cocktail rims that impress, homemade colored sugar will undoubtedly elevate your treats and make every creation feel extra special.
So, gather your granulated sugar and your favorite gel food coloring, and get ready to sprinkle some magic into your next culinary adventure! We encourage you to experiment with different hues, create unique blends, and most importantly, enjoy the process. Don’t forget to share your colorful baking creations with us – we love seeing what you make!